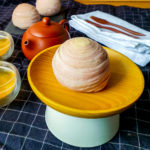
Teochew Spiral Yam Mooncake
Layered and flaky pastry encasing a sweet yam / taro paste. Pretty to look at, and extremely delicious to eat!
Servings: mooncakes, ~65-gram each
INGREDIENTS
Oil Dough
- 180 grams plain flour
- ⅛ tsp salt
- 100 grams shortening
Water Dough
- 200 grams plain flour
- 7.5 grams purple sweet potato powder, optional
- 25 grams caster sugar
- 50 grams shallot oil, lard or peanut oil can be used instead
- 100 grams water
- ½ tsp vinegar
Filling
- 720 grams yam filling, divide into 20 portions, about 35-grams each
INSTRUCTIONS
The Day Before - Oil Dough
- Sift flour and salt into a mixing bowl. Whisk to mix the salt evenly throughout the flour. Add in shortening and mix into a dough - I start off by using a firm spatula / wooden spoon, then finish mixing by hand. Wrap dough with clingwrap and chill overnight.180 grams plain flour, ⅛ tsp salt, 100 grams shortening
The Day Before - Water Dough
- Sift flour and sweet potato powder (if using) into a mixing bowl. Add in caster sugar and whisk to mix the dry ingredients. Add in oil, water and vinegar. Mix with a firm spatula / wooden spoon until the mixture starts to form a dough, then finish mixing by hand. Wrap dough with clingwrap and chill overnight. This allows gluten formation and reduce the need to knead the dough by hand200 grams plain flour, 7.5 grams purple sweet potato powder, 25 grams caster sugar, 50 grams shallot oil, 100 grams water, ½ tsp vinegar
Combining the Doughs - see Note 2
- Take out the oil and water dough from the refrigerator and let them come to room temperature.
- Weigh your water dough. Divide water dough into 10 equal portions by weight. Roll each portion into a ball. Set aside, covered with clingwrap.
- Weigh your oil dough. Divide oil dough into 10 equal portions by weight. Roll each portion into a ball. Set aside, covered with clingwrap.
- Take the first water dough portion, flatten with your palm into a disc and encase the first oil dough portion, ensuring the water dough is evenly wrapped around the oil dough. Set aside to rest, covered with clingwrap. Repeat until all oil dough portions are wrapped with water dough portions.
- First Roll. Take the first dough portion and flatten with your palm into a disc. Take a rolling pin and roll it out gently into a long rectangular shape, about 3-mm thick. Do it gently so that the oil dough doesn't get squeezed out. Roll up the dough from the long-side tightly. Set aside to rest, covered with clingwrap. Repeat until you have 10 rolled-up logs.
- Second Roll. Take the first rolled-up log and place it seam-side up. Flatten the log with your palm and roll it out again gently lengthwise into a long rectangular strip, about 3-mm thick. Try to ensure that the dough has straight edges and is of even thickness so that it rolls up evenly. Starting from the short side, roll up the dough tightly into a roll. Set aside to rest, covered with clingwrap. Repeat with the remaining rolled-up logs.
- Take 1 rolled-up dough and use a very sharp knife to cut the dough into half. Repeat for all the rolled-up doughs (you will get 20 dough portions).
Wrapping the Mooncake - see Note 3
- Line a baking sheet with parchment paper or silpat.
- Take the first dough portion and place it cut-side up. Flatten with your palm into a disc. Flip the dough and roll gently from the centre outwards into a 7 to 8-cm circle - the dough should stay round and the centre stays centered. Roll the edges slightly so that the edges are thinner than the centre of the dough.
- Place 1 filling portion in the center of the dough - the cut-side of the dough should be facing outside. Encase the filling with the dough, keeping it as round as possible without distorting the layers. Pinch the bottom to seal. Shape the mooncake slightly so that they are round.720 grams yam filling
Freezing
- The unbaked mooncakes can be frozen for 2 to 3 months if properly stored. Place them on a lined baking sheet, ensuring that they are not touching each other. Freeze overnight until completely solid, then transfer to a vacuum seal bag.
Baking
- Unfrozen mooncakes: Preheat oven to 150°C (conventional) / 140°C (convectional). Place the mooncakes on a lined baking sheet, spacing them 2 inches apart from one another. Bake 30 minutes until cooked through (if the mooncakes are browning, tent it with aluminum foil.) Let mooncakes cool on the hot baking sheet for 15 minutes, then transfer to another baking sheet to cool completely.
- Frozen mooncakes: Preheat oven to 150°C (conventional) / 140°C (convectional). Place the frozen mooncakes (no need to thaw) on a lined baking sheet, spacing them 2 inches apart from one another. Bake 25 minutes, then reduce temperature to 140°C (conventional) / 130°C (convectional) and bake for another 15 minutes until cooked through (tent with aluminum foil if needed). Cool as above.
Storage
- The baked mooncakes can be stored in an airtight container at room temperature for 2 to 3 days. Toast the mooncakes in the oven or air fryer before consuming.
NOTES
- Always keep dough that are resting or you are not working on covered with a clingwrap to prevent drying out. I like working on a silpat so that I don't have to use additional flour when rolling out the dough. You can also place a clingwrap (or plastic guitar sheet) on top of the dough when rolling to prevent sticking.
- I referred to this YouTube video on how to combine and roll out the dough.
- I referred to this YouTube video on how to seal the dough.
- Recipe is adapted from Guai Shu Shu's Teochew Yam Spiral Mooncake
Tried this recipe?Mention @foodiebaker or tag #foodiebaker!