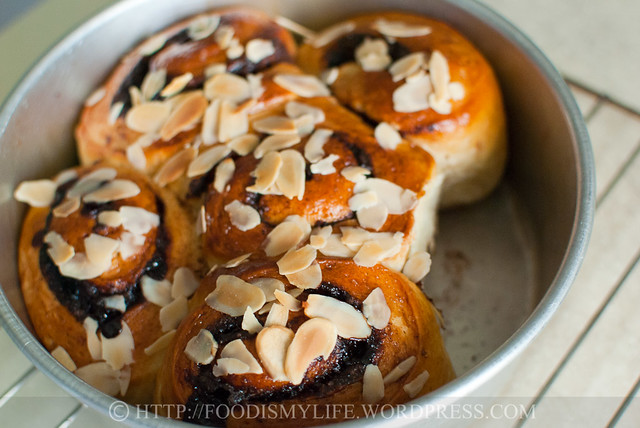
This is probably by-far the most challenging bake for The Home Bakers and second most challenging bakes I’ve ever encountered (the first would still belong to these macarons – I had failed at least 5 times baking them…)
To be honest, I almost wanted to give up baking it – I’ve tried it twice and both times the bread was just too hard and dry and I was already late for the submission. But you know how sometimes, the more we failed at something, the more we will try it to get it right? And finally, the 3rd and 4th tries were successes! Okay not say a 100% success, but 70%? The bread was soft and fluffy, and the chocolate swirls were absolutely delicious. I just wished that it would be even more softer – maybe I should try it out with bread flour / knead more etc… but overall I’m really glad that the bake turned out to be pretty darn good!
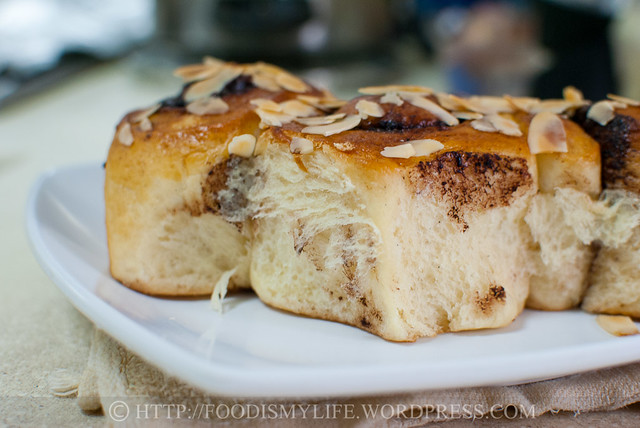
When I took photo of this bread, I’ve already eaten two of them! Warm bread is so soft and fluffy and yummy!
When I first saw the name of this bake, it wasn’t bread as stated in my title, but it’s actually a cake, and after reading the recipe and trying out the recipe, I feel that this is definitely not a cake but a bread. I wonder why the author called it a cake?
Anyway, putting the name issue aside, after failing the first try, I felt that the method of baking this bread to be too complicated and troublesome. So far whenever I see people baking bread, it’s just about mixing, kneading, rising, kneading and shaping. I went around researching and decided to change the steps, I hope this will encourage more people to bake this and delicious bread!
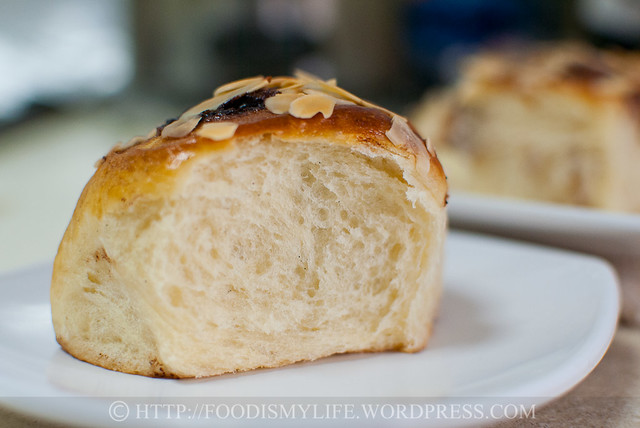
Grab one roll~!
Here are 3 major changes I’ve made:
- Instead of creaming the butter, sugar and egg, I chose to dissolve them (except the egg) into milk and mix the egg and flour in.
- Instead of shaping the dough as stated in the recipe (which I couldn’t really understand), I simply rolled it out into a large rectangle, sprinkle the filling, roll it up then cut into rolls. I also baked them in a tin with them arranged together.
- I changed the streusel filling into a simple sugar-cocoa powder-cinnamon mix. I brushed the rolled-out dough with melted butter before sprinkling the filling so that it will stick.
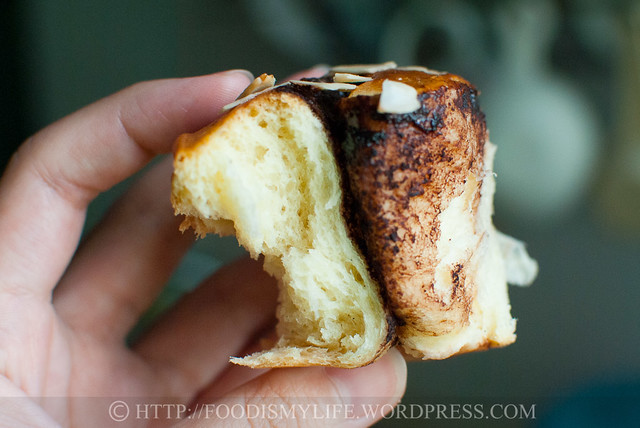
Chocolatey, soft and fluffy 😀
This bread is best served on that day it’s bake. It was a little hard on the outside but still soft on the inside after 1 day. After 2 days, it had become a little too tough for my liking, so I’m looking for another way to make a much softer bread with a longer shelf-life.
After this bake, I realized bread-baking is very interesting and pretty fun. This is my first attempt in bread-baking and I’m sure there would be many more to come!
Let’s get started!
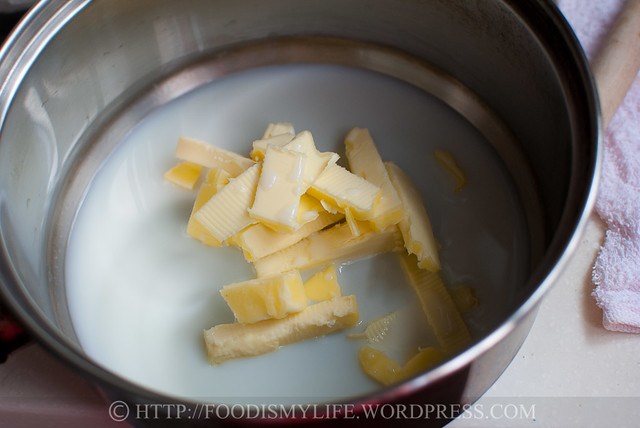
Start off with milk, water, butter, sugar and salt in small pot.

Bring it to a simmer – making sure the sugar and salt has dissolved and the butter has melted – then transfer it to a large mixing bowl. Let the mixture cool slightly (I take this time to wash the pot – by then the mixture should have cooled till very warm but not hot).

Add in vanilla extract/paste. I’m using vanilla paste here – it gives the bread very beautiful specks of vanilla seeds.
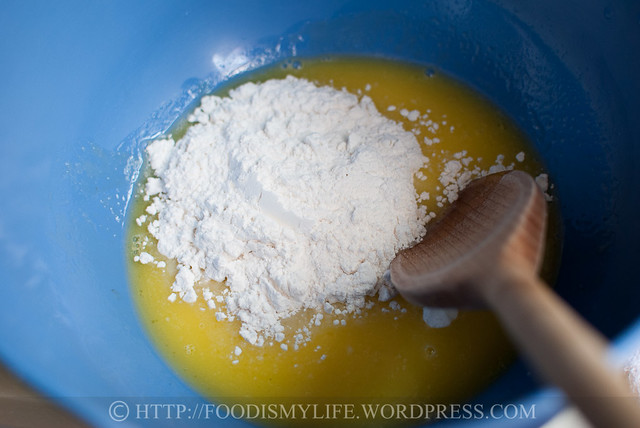
Stir in some flour – the colour will lighten to a pale beige colour.

Stir in 3/4 of a beaten egg. The remaining 1/4 egg is used as an egg wash later on.
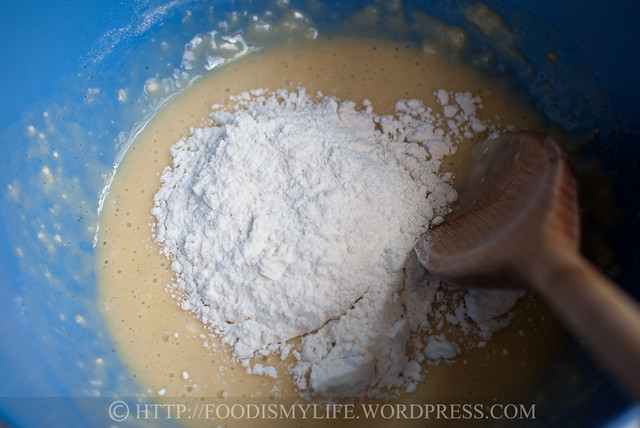
Dump in more flour.
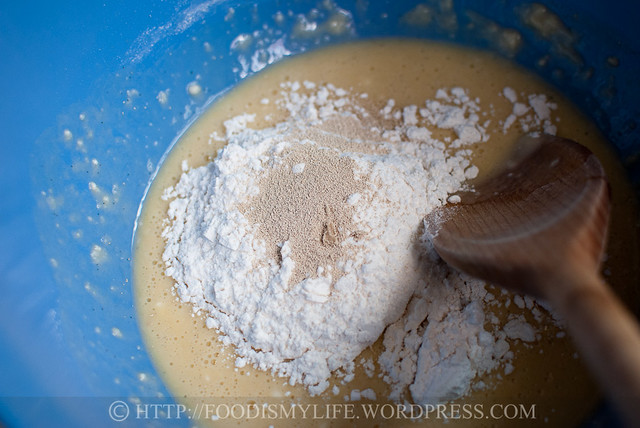
And yeast. (I’m using instant dried yeast.)
In general, there are 2 kinds of yeast:
Active dried yeast – this type of yeast, as its name suggests, requires activation. If you’re using this kind of yeast, add the yeast into the some warm water and sugar and let stand for 10 minutes till foamy. Heat the milk and salt together (omit the water and sugar that you used to activate the yeast), add in the flour, egg and then the yeast mixture.
Instant dried yeast – this type of yeast does not require any activation. It is often added in together with flour, hence I’m adding it together with my second addition of flour when the mixture is still warm.
(Source: The Fresh Loaf)
It took me really long to figure out the difference between the 2… I initially thought they were the same! :p
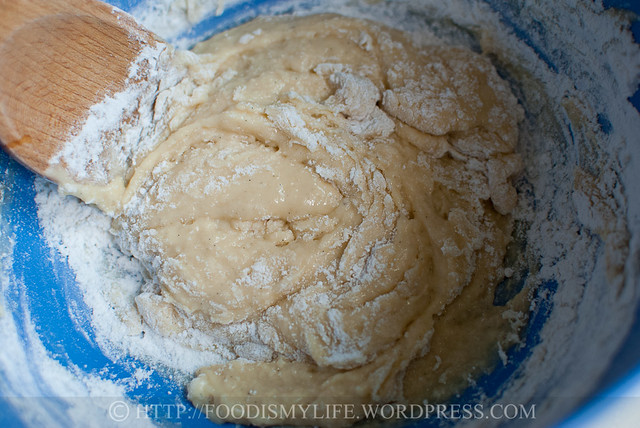
Add in more flour, mixing thoroughly after each addition until you get a soft dough and that it doesn’t stick to the wooden spoon anymore.
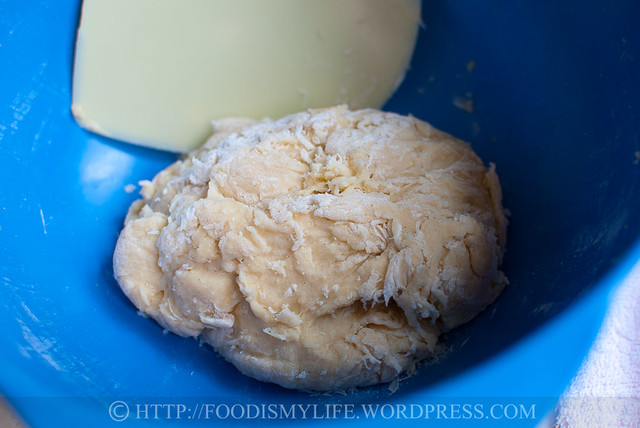
Something like this!
Next your turn it out and knead until it’s soft and elastic.
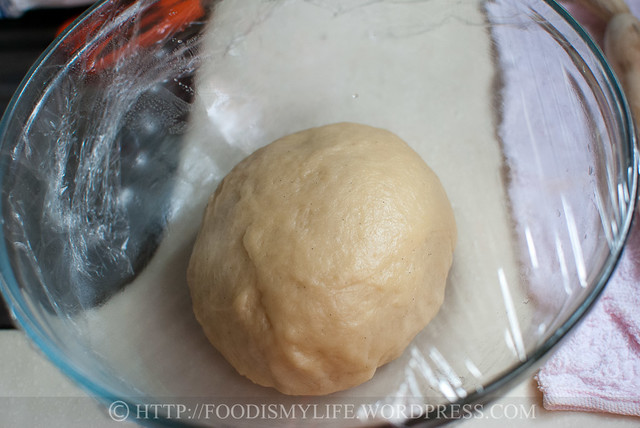
After kneading, you’ll want to let it proof in a very warm place.
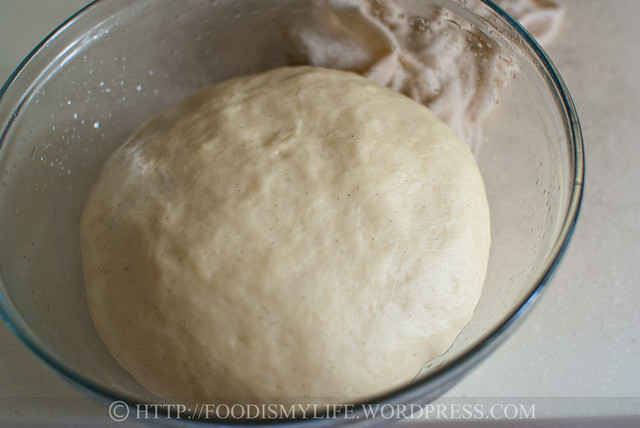
It’s ready once it’s been proofed double its size! Takes about 1 hour to 1 1/2 hour.
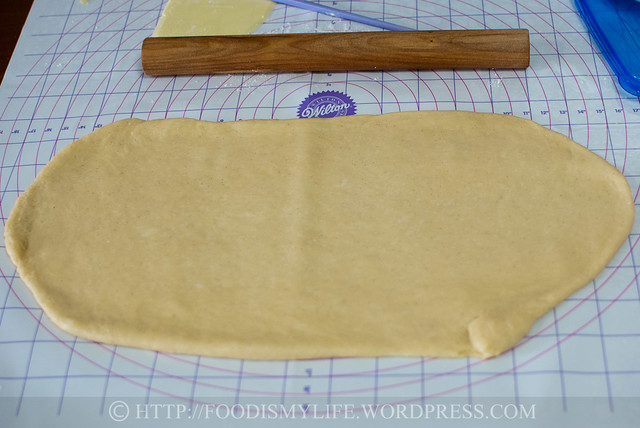
Take out the dough, knead till smooth and roll it into a large rectangle.
(This photo is actually from my 4th attempt – I rolled it larger and thinner so that I get more swirls in the bread.)
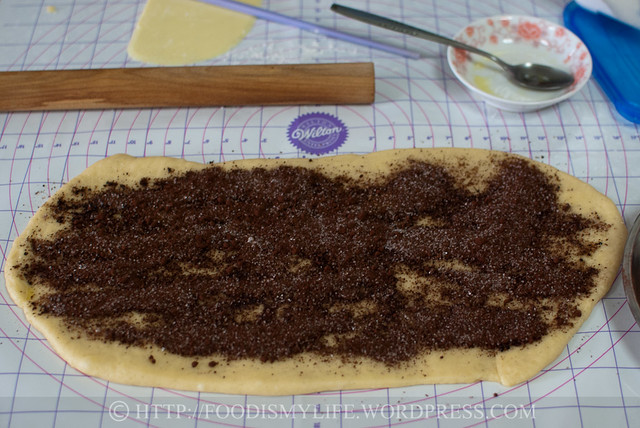
Brush melted butter all over the dough then sprinkle a sugar-cocoa-cinnamon mix evenly on the dough.
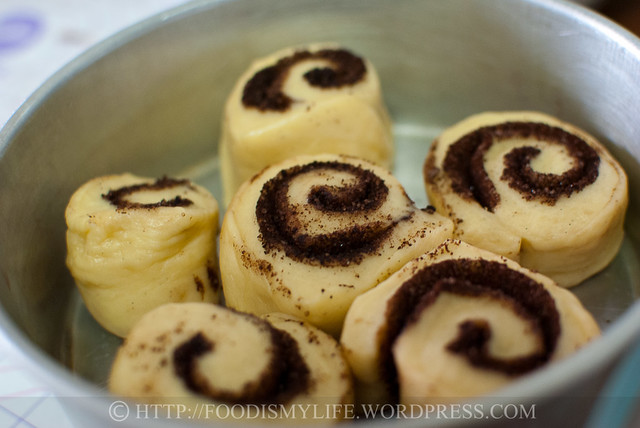
Roll it up and cut them into 1-inch / 1 1/4-inch thick rolls.
(This photo is actually from my 3rd attempt. I didn’t roll the dough thin and big enough so the swirl is not as pretty. And I only managed to get 6 rolls from the 3rd batch and each roll proofed to be the size slightly smaller than a fist. I managed to get 10 rolls from the 4th batch as I rolled the dough thinner and bigger. However I couldn’t fit all 10 rolls in the 7-inch tin I’m using. You’d prob need a 9-inch one instead.)
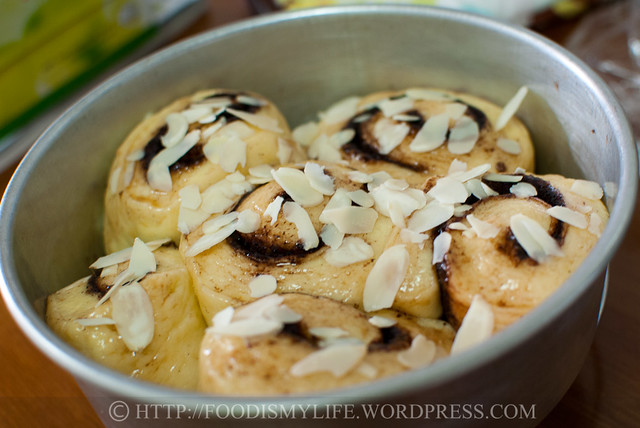
Cover and let proof till double in size again, about 30 to 45 minutes.

Bake for 18 – 20 minutes till golden brown. Serve warm!
I’m submitting this to:
- The Home Bakers #10 – the original recipe can be found here, baked by lovely Anuja from Simple Baking. Check out all other members’ bakes here!
- Twelve Loaves hosted by Cake Duchess, Creative Culinary and Lifesafeast.
- Bake Your Own Bread hosted by Heather of Girlichef, Michelle from Delectable Musings and Connie from My Discovery of Bread
- Wild Yeast Blog/YeastSpotting hosted by Susan
Danish Chocolate Swirl Coffee Bread (makes 6 – 10 rolls)
adapted from Coffee Cakes by Lou Seibert Pappas.
Note: This is my first time baking bread and I took about 3 tries to get it somewhat right. If you’ve any advice on kneading, proofing, etc please share with all of us! 🙂 If you’ve not baked bread before, here are some videos that I found very useful when trying to bake bread:
- Epicurious – I found the videos on kneading, first rise and second rise very useful.
- How to Make Homemade Bread by riboflavinjoe – a very simple video that teaches how to make basic bread, but I learned the method of proofing from here.
- How to Make Bread from Scratch by TheCraftyGemini – a great video with lots of useful information on bread-baking.
Bread
1/4 cup milk
1 tablespoon water
40 grams unsalted butter, softened and cubed
2 tablespoons sugar
1/8 teaspoon salt
1/2 teaspoon vanilla extract
1 1/4 cups to 1 3/4 cups plain flour
3/4 beaten egg
1/2 teaspoon instant dried yeast
Filling
1 tablespoon butter, melted
2 tablespoons sugar
1 tablespoon cocoa powder
1/2 teaspoon cinnamon powder
Egg wash
1/4 beaten egg
1 tablespoon almond flakes
Preheat the oven to 100 degrees Celsius and boil a kettle of water. Lightly oil/butter a large heatproof bowl (to be used for proofing the dough later) and a 7-inch or 9-inch baking tin.
Combine the milk, water, butter, sugar and salt in a small pot. Bring to a simmer. Transfer to a large mixing bowl and let it cool till very warm but not hot.
Add in vanilla extract and 1/2 cup of flour and mix with a wooden spoon till the flour has been fully incorporated. The mixture will turn into a pale beige colour.
Add in the beaten egg and mix well with the wooden spoon. Add in another 1/2 cup of flour and the yeast and mix well. The mixture should now become more sticky. Add in more flour, in 1/4 cup increments, mixing well after each addition. Stop adding when the dough forms a soft dough and no longer sticks to the wooden spoon.
Turn the dough out onto a lightly floured surface. Flour your hands and the dough and knead the dough until smooth and elastic, adding more flour if necessary. The dough will be a little sticky. This process will take about 5 to 8 minutes. (In general, I kneaded my dough about 300 times but my kneading skills aren’t very good so most probably you’ll knead lesser times than me.)
Once the dough is smooth and elastic, shape it into a round oval with a smooth surface at the top. Place it in the greased heatproof bowl and brush the top lightly with more oil/melted butter.
Cover the bowl with a tea-towel. Turn off the oven and place the bowl of dough inside the warm oven. Pour 2 large cups of boiling water and put them in the oven on both sides of the bowl of dough. The water will help keep the dough moist. Shut the oven door and let the dough rise for 1h to 1 1/2 hour, till the dough has double in size.
While the dough is proofing, combine the filling ingredients – sugar, cocoa and cinnamon in a small bowl.
Once the dough has doubled in size, remove from the oven. Turn on the oven and preheat at 100 degrees Celsius.
Punch the dough down gently – you’ll hear a soft hissing sound – to release some of the air. Turn the dough out onto a lightly floured surface and knead till smooth, about 30 seconds to 1 minute.
Roll the dough out into a rectangle – about 1/4 inch thick, so that you will get a beautiful swirl. The dough will keep shrinking back, but just keep rolling! Pour the melted butter all over the dough and spread it around with your fingers or the back of a spoon. Sprinkle the chocolate filling evenly and roll the dough up, tucking it tightly. (I like to roll up from the short side so that I get a nice big swirl, but if you like smaller rolls, roll up from the long side.) Cut the dough into 1-inch or 1 1/4-inch thick slices and arrange them, cut side up, on the grease baking tin. Cover the tin with a kitchen towel.
Turn off the oven and place the baking tin in the warm oven with another 2 cups of boiling water. Let the dough rise double its size, another 45 minutes. Remove from the oven.
Preheat the oven to 175 degrees Celsius. Brush the bread with the 1/4 beaten egg and sprinkle the almond flakes all over. Bake for 18 to 20 minutes until the top is lightly golden. Let cool on a wire rack. The bread is best serve fresh and warm from the oven, but it can be stored in an airtight container for 1 to 2 days.
Happy baking!
Red Bean Bread | Food Is My Life says
[…] category, until I was sort of “forced” to bake theDanish Bread for The Home Bakers. And I found out that it’s not very difficult, there are only a few […]
erika says
Um YES these made my day! Just found your blog through GottaGetBaked and these cupcakes caught my eye right off the bat! Amazingg. I’ve made rainbow cake before, but never rainbow frosting! Totally gorgeous 🙂
mydearbakes says
Awww, great post! I’m getting so hungry after looking at the pictures! =)
Jasline says
Hi Vera, thank you so much for the compliments! 🙂
Jasline says
Hi Sam! Thank you for the compliments, I’m glad we don’t give up easily 😉 I didn’t know the detail on proofing, thanks for sharing! I’ll research more in the future and see how I can bake better bread, thanks! 😀
Jasline says
Hi Lena, I’m very sorry about wasting all the flour and butter and eggs… but lucky I got them right after three tries 🙂 And yes bread baking is really fun, hope to bake more bread in the future 😉
Jasline says
Thank you Sibella, do make them, it’s really delicious and I’m sure you’d be able to bake them better than me!
Jasline says
Thank you Anuja! I think bread baking is very addictive! I think it’s a bit too weird to cream the batter then turn it into dough, but I’m glad the bread still turned out yummy after all the modifications 🙂
Jasline says
Hi Kate, thank you! How much fat does your dad add into his loaves, is there a ratio? Thank you for the tip! I’ll try it out the next time 🙂
Jasline says
Hi Lora! Thank you so much, I hope there’d be more bread coming along so I can continue linking with #TwelveLoaves 🙂
Jasline says
Hi Zoe! Thank you for the compliments. And your family is so lucky, they get to homemade bread everyday! 🙂
Jasline says
Ahh thank you Amy! Will definitely try it out the next time, thanks!
Vera Zecevic – Cupcakes Garden says
Wholly, molly! Another baking art! You make really cool staff Jasline! Best regards from Vera
Sammie says
Great job Jasline!! And yeah I agree with you!! The more we can’t get something right, the harder we try at it!! 🙂 Very nice and fluffy! Yum! I think sometimes the texture also has got to do with the proofing temperature. I find that certain dough proof better at higher temperatures! (approx 200F) Whereas puff pastries proof better at lower temperatures (150F) hehe.. Anyway, beautiful bread. I’m sure it tastes awesome too!!
lena says
you must be so frustrated with the earlier ones that you made and am glad that you finally made it successfully! thought you’re not baking this..hehe..mine turned out a little dry, suspected i overbaked it. i didnt know that it’s your first time making bread, well after this try, i think you will be making more breads in the future, right?
Award And Paying It Forward | apuginthekitchen says
[…] Food Is My Life […]
Sibella at bakingwithsibella.com says
Jasline, this bread looks amazing! You did such a great, great job! I will save the recipe so I can make it sometime.
anuja says
Super like!! Love your write up. Very helpful. Like Zoe said, I too learned a lot about bread-baking via blogging and and it really gets you :D. I love making my breads and rolls and never buy from market. This recipe sure was a twister with all that creaming of batter and then turning it into a bread dough. But the sweet taste of success makes it all worth 😀
Kate says
They look amazing. My dad adds a little extra fat to his loaves to make them softer, don’t know if that would help.
Lora @cakeduchess says
This is stunning and looks irresistible. I want to make it now so we can have it for breakfast tomorrow. Thank you so much for linking with #TwelveLoaves:)
The Melbourne Food Snob says
I usually defrost them at about 100 degrees C – not too hot otherwise they will still be frozen in the middle 🙂
Barbara Bamber | justasmidgen says
Feet? I’ve a lot to learn about macarons.. I’ve never made them!
Zoe says
Hi Jasline,
Beware! Bread baking can be very therapeutic but can also very addictive too… After you get the hang of it, you will find yourself baking lots of bread in the future…
I learn a lot of bread baking from blogging and learn lots of tips at first from Lena. Now, my family never buy bread from shops or supermarkets and every week we get to try different kind of bread 😀
Your chocolate scrolls look wonderful! Great effort 😀
Zoe
Jasline says
Yes the happy dance! I danced it when the macarons grew their feet too 😀
Barbara Bamber | justasmidgen says
The baker’s happy dance!!
Jasline says
Thank you Joyce! I always see you baking lots of bread, hope I’ll be able to do that too in the future 🙂 I think I’ll give bread flour a try the next time. Can’t wait for the next bake!
Jasline says
Thank you very much Anneke!
Jasline says
Thank you so much for the tips Amy!! I will definitely try the freezing method – if it works I’ll be able to have freshly baked loaf everyday! 🙂 I would like to ask at what temperature do you defrost them at? The temperature used for baking the bread?
Jasline says
Thank you for the compliments Raymund! A new batch of bread is baking, please wait a while! 😉
Jasline says
Thank you Alberto, I love it too! 😀
Jasline says
Thank you Emily!
Jasline says
Thank you Mich! Rolls are much easier to make haha. I was getting lazy :p
Jasline says
Thank you Barbara! I’m glad I got them right the 3rd time 🙂 It was a moment of rejoice and I did a little twirl in the kitchen when I saw the bread was successful 😉
Jasline says
Thank you for the compliments Bobbi! Wow 5 nights in a row? That’s a lot of mangoes, rice and coconut milk I believe! But I’m glad you got the perfect results, the feeling must had been very satisfying!
Jasline says
Thank you Jeannie! Yes home-made bread smells really wonderful!
Jasline says
Awww thank you so much!! I still have lots to learn 🙂
Jasline says
I agree! But I think I can eat them at any time of the day 😉
Jasline says
Thank you Uru! I still have lots to learn 😉
Jasline says
Thank you so much for the suggestion! I’ll try the microwave method next time. Mmmm raisins and nuts sound like a delicious combination, hope to try it some day 🙂 Do give macarons a try again, maybe you’ll get it right this time 😉
Jasline says
You’re welcome 🙂 You baked a very lovely loaf of bread and I would love to try it! I’ll let you know when the bread’s ready! 😉
Jasline says
Thank you Villy! I’m so glad I finally get it right 🙂 Let me bake a fresh batch of bread for you! 😉
kitchen flavours says
You made them into lovely buns! I use bread flour even though the original is AP flour, as our AP flour is not as strong as theirs. These are indeed delicious especially when eaten warm! I’m glad that your had success with your bread making, now looking forward to more breads from you! Have a wonderful week!
notsoskinnycook says
Very cool post!
The Melbourne Food Snob says
Yum! I think they are definitely are a bread and not a cake because they have yeast in them… so I don’t understand why the recipe would say to cream the butter. I think your method makes much more sense. Glad they were finally a success 🙂
As for shelf life, most homemade breads tend to go stale quite quickly because they don’t have preservatives in them. If you freeze the bread when it is freshly baked, and then defrost in the oven it will be just like it’s fresh. Small buns usually only take about 10 minutes in the oven to defrost. I’ve had quite a bit of success doing this with both sweet and savoury breads, just wrap them in plastic wrap and put in a zip lock bag. Good luck with your bread baking endeavours!
rsmacaalay says
That looks so perfectly made, can I have some
atyjo says
L.I.K.E. your take on this month’s bake at THB’s!
Mich - Piece of Cake says
It looks beautifully done and I like the fact you made rolls out of the dough!
Barbara Bamber | justasmidgen says
I’m impressed with how many times you tried even after failing! I’m not such a persistent cook, that’s for sure! I’m glad you did, because these look just wonderful. I agree, they really are a bread? xx
Bam's Kitchen says
After 3 trials and learning a better way to do it, I am certain your bread is much better than most recipes out there. I love that side picture with the layers of chocolate, very nice. The other day I had a similar dilemma as I was hosting a Thai cooking class and I was just not happy with my mango sticky rice results so made it 5 different ways on 5 nights in a row until I go my results perfect with the tools available here in HK. I don’t think I will be able to eat mango sticky rice again for some time… LOL.. Take care, BAM
Jeannie says
You’ve made this into cinnamon rolls! Looks delicious and bet they smelt good during baking huh!
apuginthekitchen says
They look really delicious, I think you did wonderfully. The rolls look perfect to me.
yummychunklet says
I bet these would taste wonderful for breakfast on a cold morning!
Choc Chip Uru says
Success my friend in the yummiest form – wow 😀
Cheers
Choc Chip Uru
A_Boleyn says
I love this type of coffee cake/sweet bread recipe and find it very easy to create successfully in contrast to macarons which failed miserably the first time I tried to make them, discouraging me enough, in fact, that I never attempted to repeat the experience. 🙂 I especially like the chocolat-almond variation as, to date, cinammon/ground nut or raisins are my usual fillings. Sometimes ground poppyseeds cooked in milk and sugar if I’m feeling nostalgic for my mom’s old recipes.
I agree that the buns don’t keep well til the next day though I’ve found that a short low blast in the microwave does help return some of the soft/tender texture.
albertocook says
I love this
mrsdmsartroom says
Thanks for sharing my Espresso Chocolate Chip Bread! Love your blog, I’ll be following along now. And I agree with Villy, wish I had a piece right now!
Villy says
This most definitely looks like a successful trial Jasline! I would looooove a piece from it right now with my tea…