Having a good-quality, gelatin and collagen-rich chicken broth is the first step to a delicious meal. It is not just a base for soups and stews, but can also be used to cook grains and sauces. If you have a pressure cooker, do give homemade chicken broth a try – you’ll be surprised by how easy and how delicious it is!

Broth vs Stock
Broth is made from meat and vegetables while stock is made with bones. I nowadays make mine with bones and vegetables… so should it be called bro-tock or st-roth? Anyways, for the purpose of home-cooking, I think there is no need to be so particular about the naming. I use my broth for all purposes – as a soup base, or for stir-frys.
Homemade vs Store-Bought
I know many people will ask – is it really worth it to make your own?
In Singapore, store-bought chicken broth can be inexpensive – 1 litre of broth costs only SGD $4 (famous well-known brand).
One kampung chicken (about 1kg) costs SGD $13 – $16 these days, and can yield about 1.5 litres of broth, which is about SGD $9 – $11 per litre. And we still haven’t count in the utilities and time spent etc.
At more than double the costs, it doesn’t seem right to be making your own. But this comparison is inaccurate. If you look at the ingredient list of this cheap chicken broth, it contains additives, flavour enhancers (E621 = MSG), and even food colouring (like why?!). But homemade is just 2 ingredients: chicken and vegetables.
The right comparison should be with those frozen chicken broth that claim they do not add any additives. You would realise they can easily costs more than SGD $10 per litre, and likely even more, especially if they tout “collagen” in their broth.
I’m not a nutritionist, so I will not go into whether it is healthier drinking homemade broth, but economically, I think it is worth it to make your own.

The Ingredients
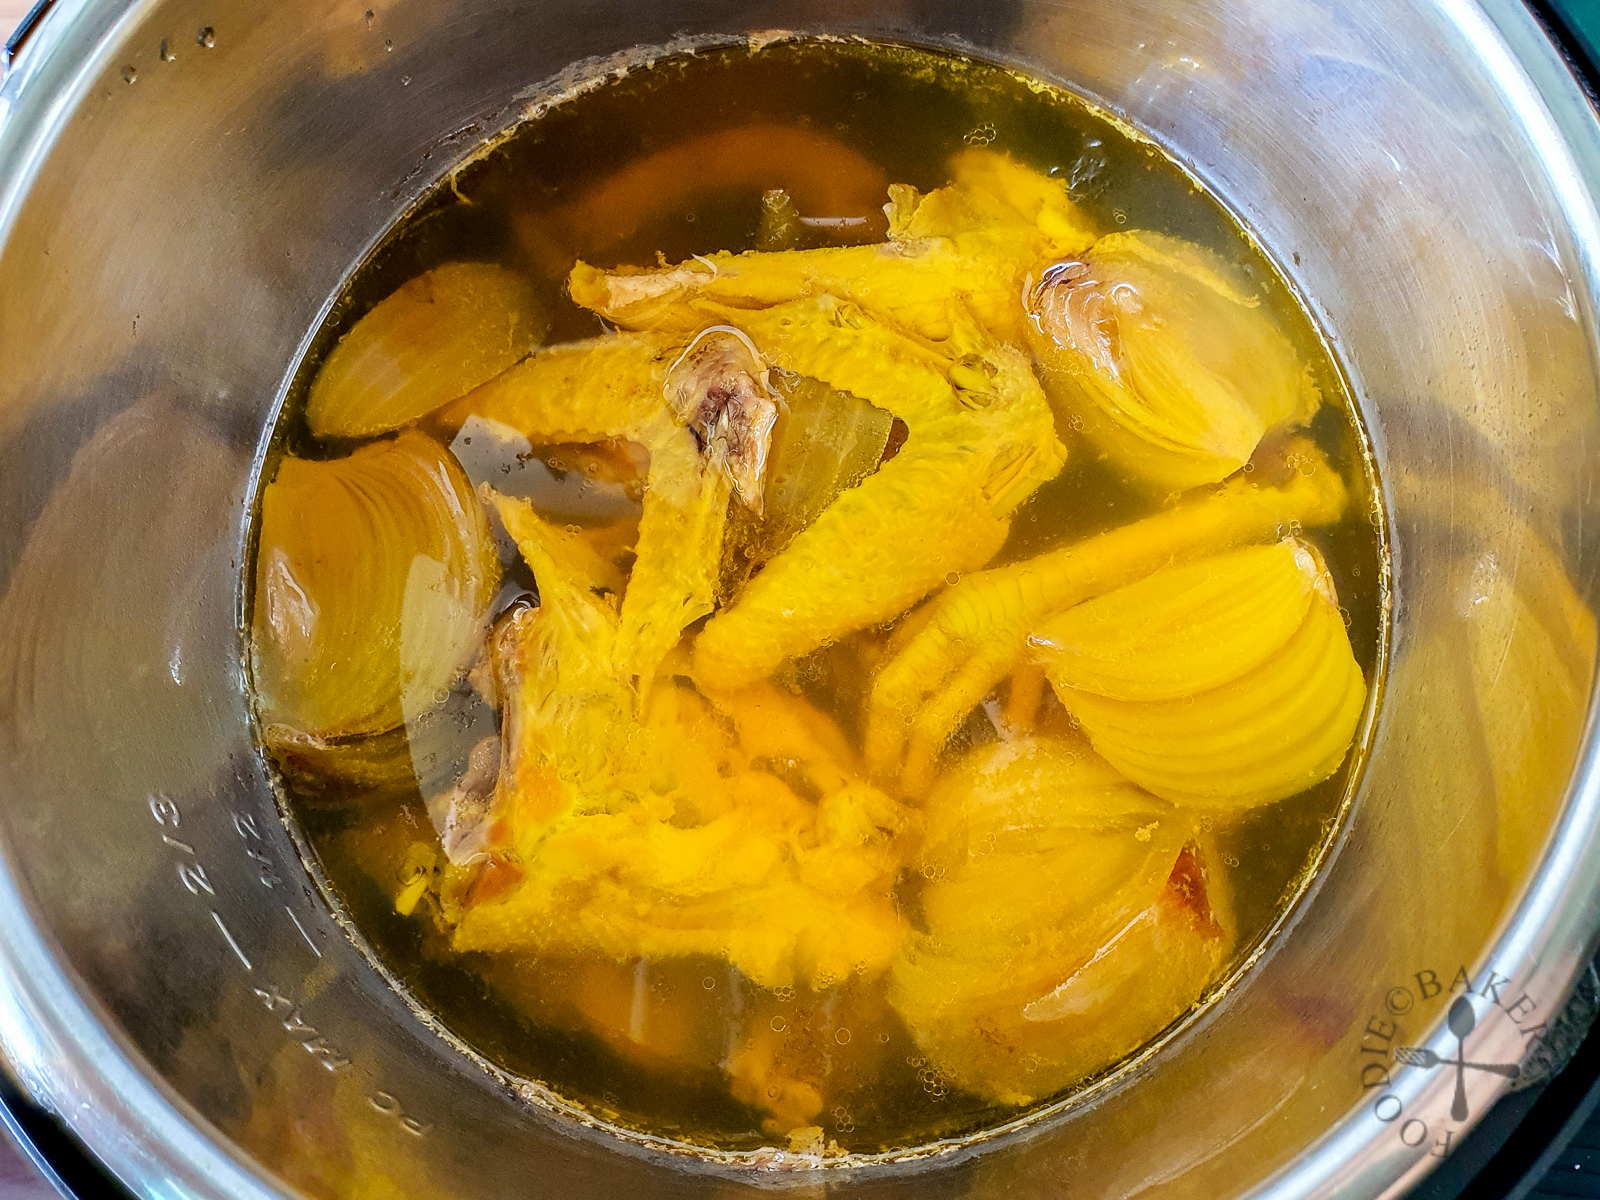
I keep my chicken broth simple these days – just chicken and onion. For the chicken, I use a mix of raw whole chicken, raw chicken carcass, rotisserie chicken carcass and/or chicken feet.
Raw whole chicken. I use an entire chicken if I am planning to use the chicken meat in a follow-up recipe like chicken pasta soup, or chicken porridge. It requires a little planning as you need to cook the chicken in the pressure cooker first, remove and shred the meat, then return the carcass for a second pressure cooking. Freeze the shredded chicken in portions for a quick meal. In Singapore, I can use either kampung chicken or normal chicken to make broth. I prefer kampung chicken because they are leaner so the broth is less fatty, but they are definitely a little more pricier than normal chicken.
Raw chicken carcass. In Singapore, I’ve seen wet markets and supermarkets selling chicken carcasses. It’s inexpensive, and a great way to make chicken broth if you want the broth for another recipe like fried white bee hoon.
Rotisserie chicken carcass. This is one of my favourite ways of accumulating bones for the broth. I usually save them in a container – once it’s full, I know it’s time to make some broth.
Chicken feet. If you want a gelatinous broth / stock – the kind that will set into a jelly – adding chicken feet is the easiest and cheapest way as they are super rich in gelatin. (Some may also call it collagen.) In Singapore, we get pretty clean and peeled chicken feet, so I don’t have to do much. It’s also very cheap! I got them for SGD $0.10 each at my wet market, and I usually use about $1 worth of chicken feet each time I make a batch of broth.
Vegetables. I add only onions these days into my stock / broth as I want to keep the flavour neutral (and also to keep costs low!)

Shorter Cooking Time with a Pressure Cooker
In the past, I simmered my pork bone broth for almost the whole day to get this rich, gelatinous broth. But it is really time-consuming and the whole house will get quite warm because of all the heat and fire. The Instant Pot is truly a time-saver!
A pressure cooker traps the steam generated as it heats the contents. The pressure increases as the steam builds which will drive the boiling point of water past 100°C. The higher temperature shortens cooking time and because it’s so tightly sealed, there is almost no evaporation of liquids. You can read more about the science here.
I personally uses an Instant Pot – I really like it because it’s electric and has a stainless steel insert (which I greatly prefer to those non-stick coated inserts). The only issue I have is that silicone ring in the lid will pick up the smell of whatever I cook (especially meaty stuff), but thankfully it will be less strong after airing it for a few days.
I find 1 hour to be sufficient in extracting all the goodness for my chicken broth using the pressure cooker.

Clear vs Milky Broth
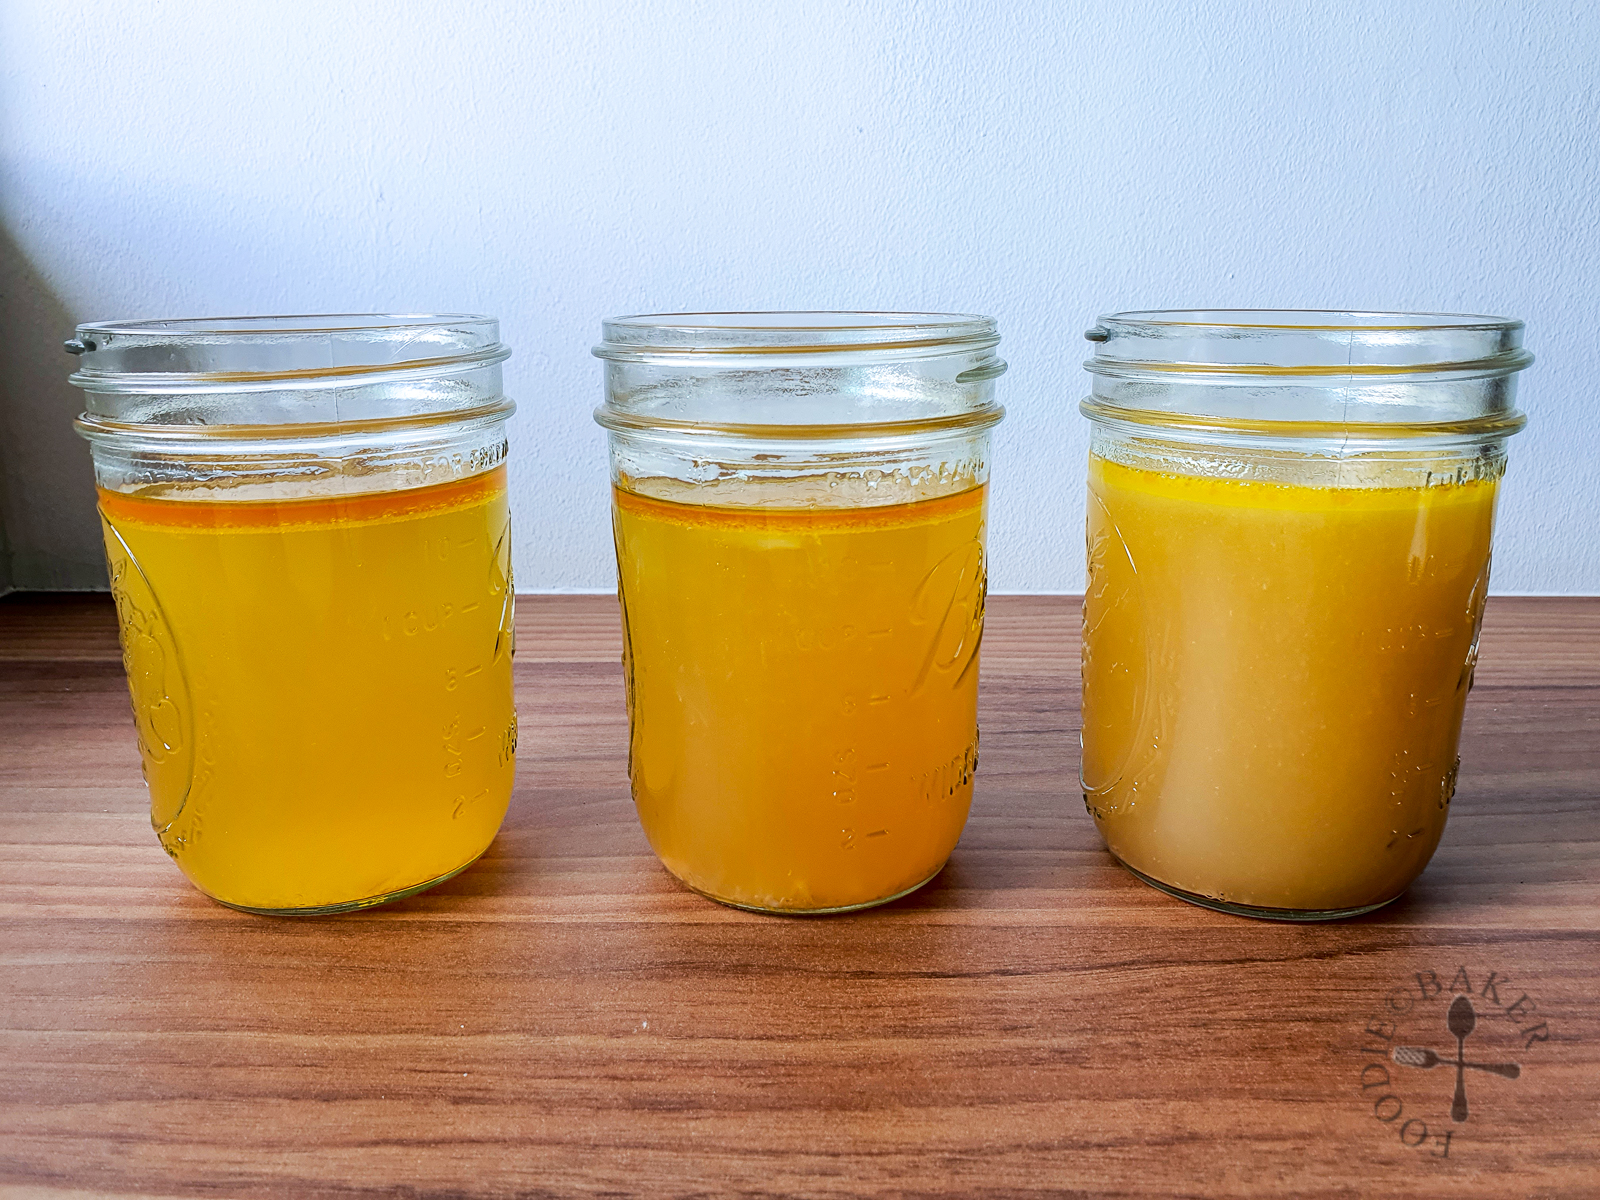
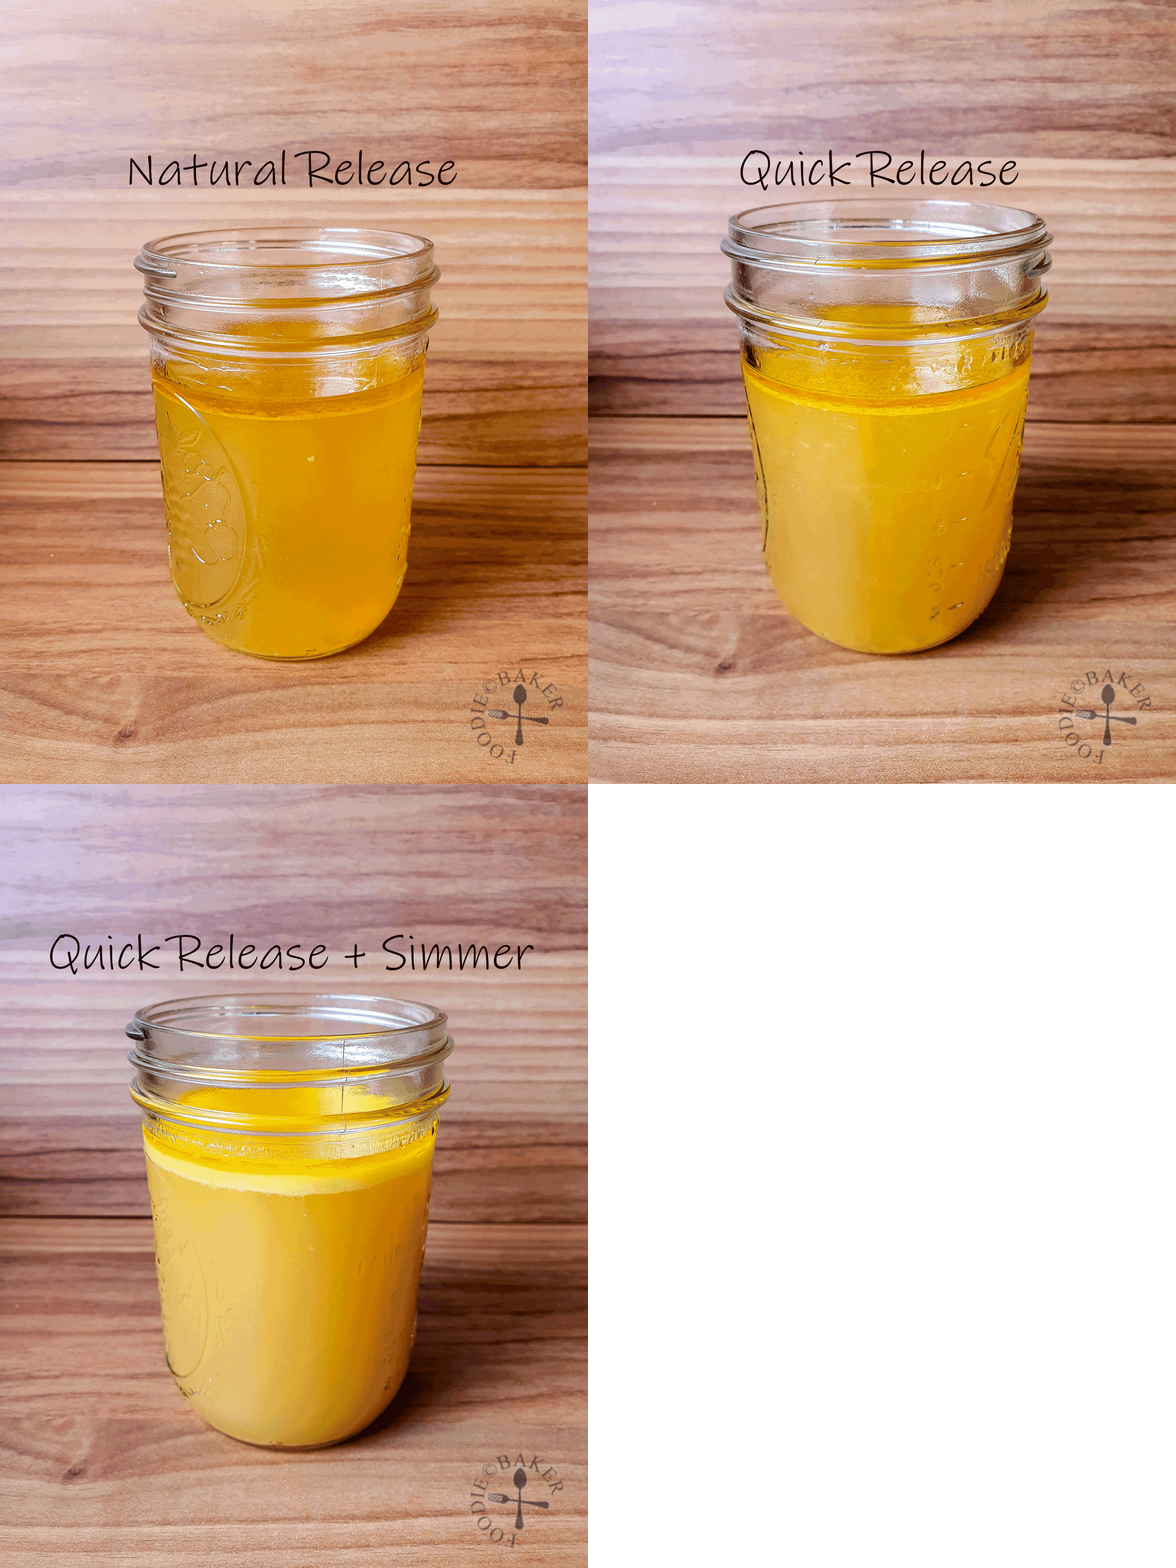
I tested three methods of making the chicken broth – natural release, quick release, quick release + simmer.
Natural Release. This method yields the clearest looking broth. It is light, sweet and bright in terms of flavour – I could taste the chicken and onion flavour together. It is meant for recipes where clarity of the broth is important, and/or lightness of flavour is favoured.
Quick Release + Simmer. A vigourous boil will be triggered in the pressure cooker when pressure is released quickly. The boiling from the quick release and the simmering will result in some of the protein and fat to emulsify into the liquid, making it opaque and cloudy. Because of the presence of fat in the liquid, the broth will give a lip-coating stickiness and tastes richer in texture.
Quick Release. The broth will be somewhat in between natural release and a quick release + simmer.

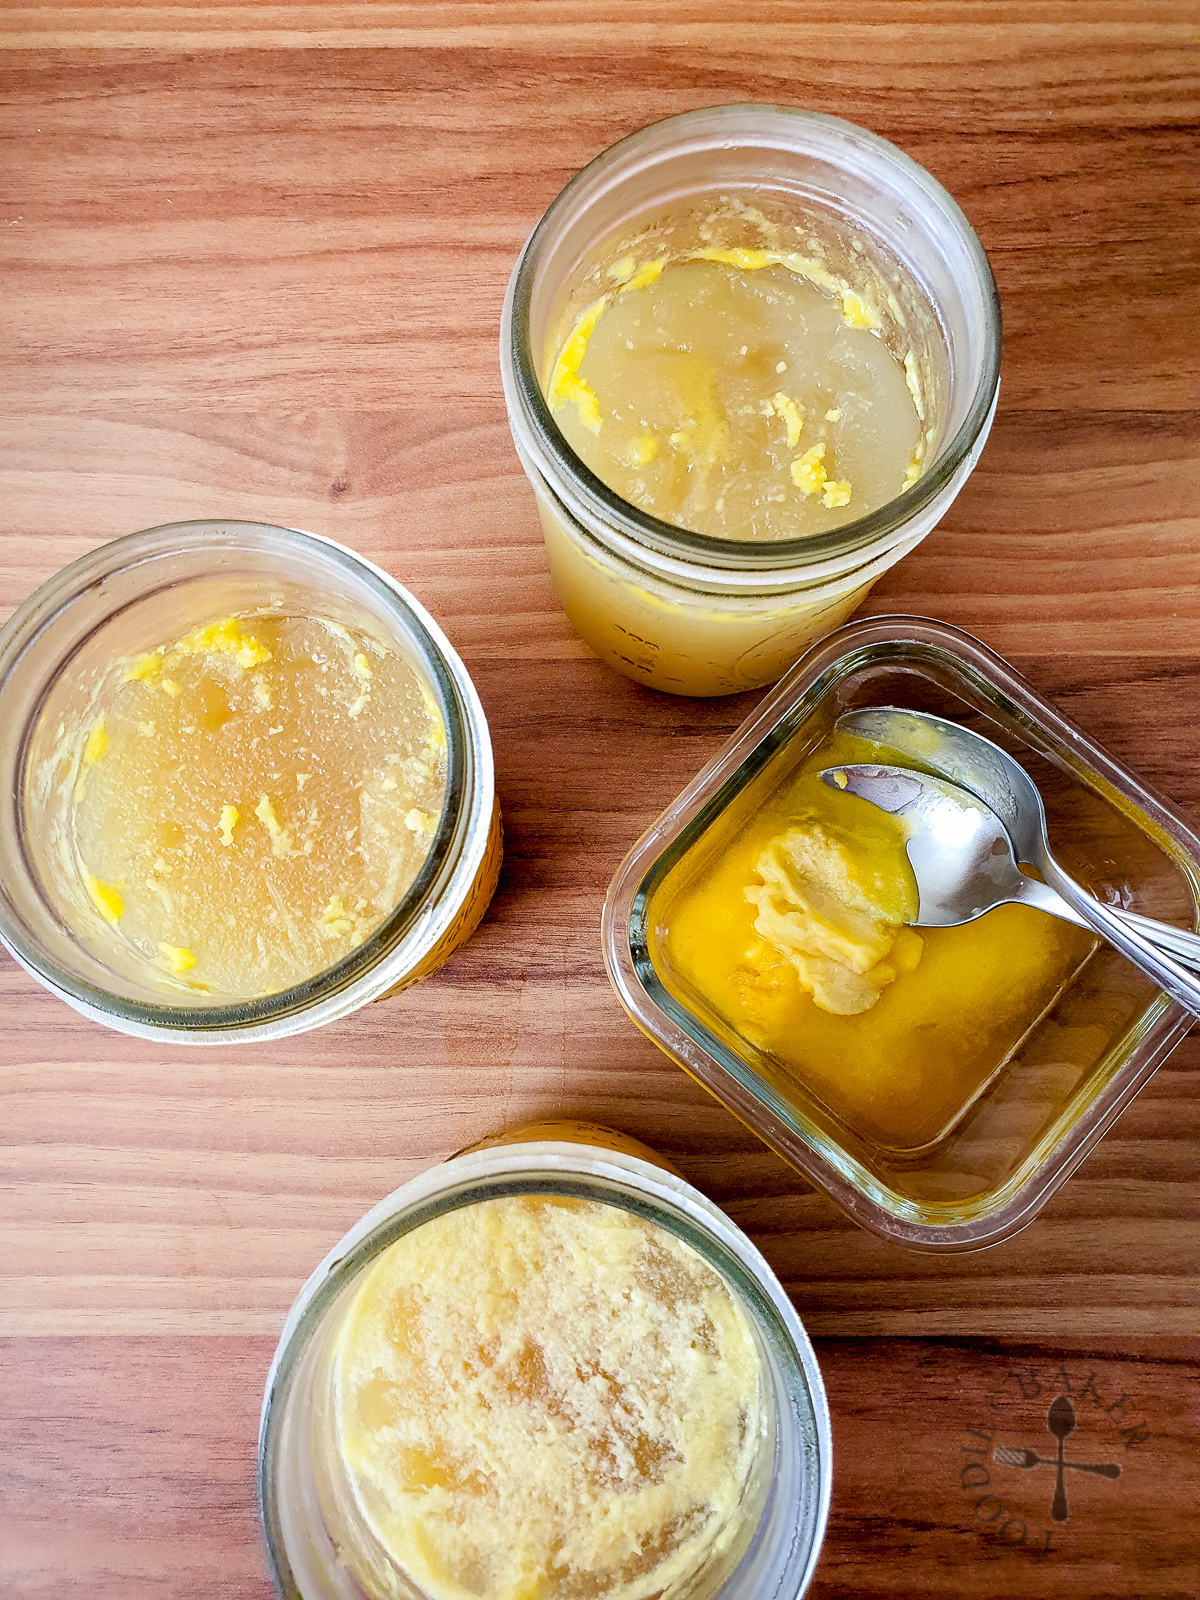
Regardless of the cooking method, because of the use of chicken feet, all three broths are rich in gelatin. This is evident from the broth setting into a jelly after refrigerating overnight.
Personally, the quick release + simmer method works best for X and I. I think this is because we grew up drinking soups that are simmered over the stove and hence are richer in texture. I also like this method as the simmering reduces and concentrate the broth, so it takes up lesser space in the refrigerator.

Storing and Freezing the Broth
Skimming off the fat. Strain the broth, then cool it to room temperature before chilling it overnight in the refrigerator. The fat will float to the top and the broth will set into a jelly consistency. The next day, I will skim off the fat that has accumulated on top. (Use the fat in stir-frys!)
Reduce and concentrate (optional). If I don’t have a lot of freezer space, I will simmer the broth to reduce it by at least half before storing. When reheating the concentrated broth, dilute it with water as needed.
There are usually 3 ways to freeze the broth – 1) ice cube trays; 2) ziploc bags; and 3) containers.
Ice cube trays – great for sauces and stir-frys. Ice cube trays come in a wide variety of sizes so you can freeze them in different-size portions as required. Once frozen, pop them out to store them in ziploc bags or containers.
Ziploc bags – great for freezing flat. Ziploc bags also come in a wide variety of sizes so you can also freeze them in different-size portions as required. Compared to ice cube trays, they save a lot more space because they can be frozen flat. I used to use ziploc bags as well but I eventually stop because they are not as environmentally friendly. Even though some say that they can be washed and reused – they are a pain to wash, especially when they are oily.
Containers – more for soup bases, glass preferred. I tend to use my broth for soups and noodle soups these days so I freeze my broth in containers. I personally like wide-mouth mason jars. It is microwavable (minus the lid) and because it’s made of glass, it’s easier to wash and clean. But they do take up a bit more space in the freezer.

To end-off, I must admit that sometimes I do reach out for store-bought broth because of the convenience. There’s never a right or wrong, as we all only want the best for ourselves and our loved ones. But if you already have a pressure cooker, why not give homemade chicken broth a try?
Instant Pot Chicken Broth
EQUIPMENT
- Pressure cooker ; I'm using Instant Pot 6-Quart
INGREDIENTS
- Chicken carcass, raw or leftovers from roasted, as many as you have
- Chicken feet, as many as your budget can afford
- Onion, one or two will do, peeled and diced
INSTRUCTIONS
- Trim off excess fat from the chicken carcass. Snip off the toenails off the chicken feet, and remove any leftover yellow-y skin.
- Place chicken carcass, chicken feet and onion into the pressure cooker. Add water until the water just covers the ingredients.
- Cook on high pressure (or Soup/Broth function on the Instant Pot) for 1 hour.
1) For Clear Soup
- Allow the pressure cooker to release the pressure naturally. Strain and enjoy.
2) For Milky + Concentrated Soup
- Quick release the pressure cooker by turning the valve. Remove the lid and simmer (or Sauté function on the Instant Pot) for 15 to 30 minutes, until the soup is milky and concentrated to your liking. Strain and enjoy.
Alternative: Whole Chicken Broth
- Place whole chicken, chicken feet and onion into the pressure cooker. Add water until the water just covers the ingredients.
- Cook on high pressure (or Soup/Broth function on the Instant Pot) for 15 minutes. Allow the pressure cooker to release the pressure naturally.
- Remove the chicken and shred the meat. Return the carcass back into the pressure cooker and continue to cook on high pressure for another 45 minutes. Follow (1) or (2) for your desired chicken broth.
Storage
- Strain the broth into a clean bowl / jug. Let cool to room temperature then chill in the refrigerator overnight.
- The next day, skim off the fat. If desired, you may simmer the broth to concentrate it. Portion the broth into ice cube trays, ziploc bags and/or containers. Freeze until required.
- Thaw the broth overnight in the refrigerator, in a microwave, or simply add it directly frozen into pots and reheat until melted, then turn up the heat to bring it to a simmer.
NOTES
- There’s no need to be exact when making chicken broth. Relax and keep it simple!
- If you want absolutely clear chicken broth, use only raw chicken / raw chicken carcass. Rotisserie chicken will brown the broth.
- If you have a good relationship with your butcher, have them debone whole chicken for you – save the drumsticks for roasting, and the thigh meat and breast meat for stir-frys. The carcass can go into making the chicken broth.
- Save up your rotisserie chicken carcasses! Freeze them in ziploc bag or container until you have a few of them before using them to make chicken broth.

What are you thinking?