
This is my attempt in recreating my maternal grandparents’ Hokkien bak chang. It will never be as good as theirs, but I will keep making them to keep the traditions alive. Use the content page below to navigate to the different sections of the post!
17 Jun 2023: I have updated the notes and recipe based on 2023’s attempt. The notes are tracked in blue (:
Glutinous rice dumpling (zong zi 粽子) is a traditional Chinese rice dish made by wrapping glutinous rice with bamboo leaves, then steamed or boiled until cooked. It is made during the Dragon Boat Festival as a food offering to honour the life and death of poet and patriot Qu Yuan (屈原). Rice dumplings have evolved over the years to include various type of fillings. The fillings can be sweet or savoury.
Chang is Hokkien for dumpling (zong 粽). The common changs I know of are Hokkien bak chang (福建咸肉粽; bak means “meat” 肉 in Hokkien), Nonya chang (娘惹粽) and kee chang (碱水粽; alkaline rice dumplings). But in Singapore, I have seen really creative (or weird) filling combinations. This includes sambal, bak kut teh, and even sweet potato custard.

To be honest, I don’t fancy those creative bak changs (and they are so ridiculously expensive). And I think for most people, their favourite changs are the ones they eat growing up. (Well, at least for me.) My favorite is the one made by my maternal grandparents. It is a Hokkien bak chang consisting of rice, dried shrimps, pork belly and shiitake mushrooms. X’s favourite bak chang is similar to mine, just that his also contains chestnuts. My best friend loves her grandmother’s bak chang, Nonya chang and curry chang.
When I was young, I used to head back to Malaysia with my Mom and my brother during the June school holidays (I live and study in Singapore) to my maternal grandparents’ place to help wrap bak chang and also to celebrate my grandmother’s birthday. I love my grandparents’ bak chang – the soft and sticky rice, the melt-in-the-mouth pork belly and fragrant shiitake mushroom. It is something that I have not been able to find in Singapore. Their recipe is also sadly lost after they have passed away.

You will never know the true value of a moment until it becomes a memory.
It’s sad that I will never have the opportunity to wrap bak chang with them again, but I want to keep these precious memories and traditions alive. So when I finally got my Instant Pot (pressure cooker), I decided it’s time to attempt making the bak changs. I started making them in 2019, starting with 500g glutinous rice. I researched tons of recipes and watched countless YouTube videos. The 2019 bak changs were too mushy as I soaked the rice overnight. I tweaked and refined the recipe, flavours and techniques over the next 2 attempts (2020 and 2021) and ended up with this recipe (2022). I think it’s fairly close to my grandparent’s bak chang, but of course theirs will forever be the best to me.

Making bak chang is tedious, time-consuming and tiring. But it is worth it. I hope the tips / notes and recipe I’ve shared can be of use if you are attempting your own version of bak chang. And most importantly, I hope you find them delicious! 🙂
Ingredient – Shallots
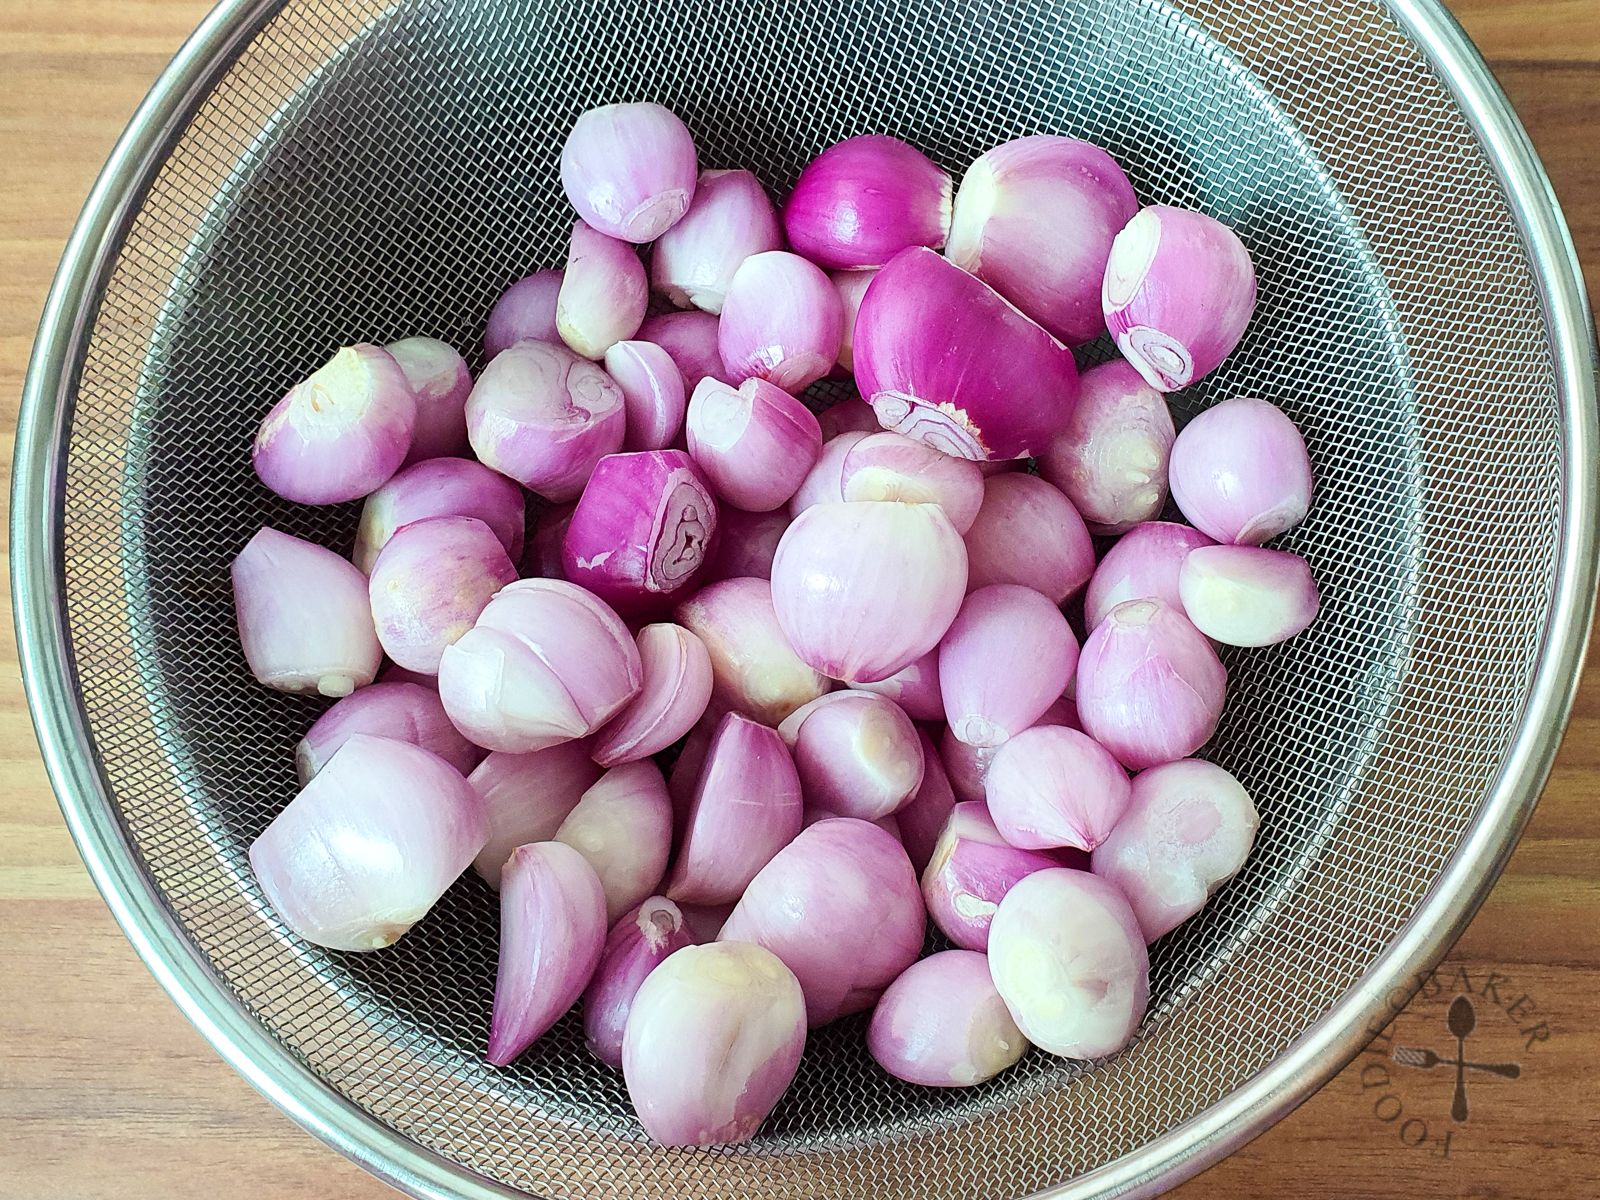
I love shallots. They are used in cooking the mushrooms, the pork and the rice. They provide a subtle sweetness and fragrance. I’m not sure how much shallots my grandparents use but I went for 500 grams 600 grams for 2kg of rice. The only pain is to peel the shallots. I usually spend an hour slowly peeling them while watching drama. The shallots are rinsed to get rid of any dirt, then drained and pat dry (or air dry). I store them in the refrigerator until the next day – they are easier to slice when cold. I then make shallot oil with the sliced shallots – the shallot oil and fried shallots are used in all the components.
Ingredient – Bamboo Leaves

Bamboo leaves are used to wrap bak chang.
Quality: Personally I like AAAA quality bamboo leaves as they are huge in size. It’s also slightly easier to wrap a bigger bak chang than small ones. The quality is usually printed on the packaging.
Quantity: It is very hard to give an accurate quantity. But 400 grams of leaves should be more than enough for 2kg of rice. If you are buying by the number, I would say go for at least 100 leaves. Although technically you only need 80 leaves (2 for each bak chang), I find that if the leaves are small or not so perfect, it will be better to use 3 leaves to wrap the bak chang.
Buy early: Look out for the leaves early (like one month in advance) from the wet market as they are sold out quite quickly. Supermarkets also sell the leaves too, so you can also get from there. However, I do like the personal touch and the ability to chit chat with the shop owners at the wet market. They are somehow always pretty surprised when I told them I’m looking for bamboo leaves. Perhaps because I think very few young (?) people still make their own bak chang these days.
Bamboo twine: I’m not 100% sure that the twine is made of bamboo. If you go to the wet market and ask for bak chang string, the shop owner will know what you are talking about.
Preparing the leaves: The leaves are soaked in boiling water overnight. I have a double sink in my kitchen so I will use the smaller sink to soak the leaves. First I scrub, clean and sanitise (with alcohol and boiling water) the sink and the sink stopper. The leaves and twine are rinsed (in the bigger sink) then transfer to the small sink. Boiling water is added until they are fully submerged. I place a large glass bowl of water on the leaves to keep them submerged. After an hour, separate the slightly softened leaves so they don’t stick to each other. Keep them fully submerged overnight. The next day, I trim off the ends when the leaves are soft.
Keep the leaves moist: After trimming, I shake off the excess water then transfer them into a container for wrapping. Keep the leaves moist. If they dry out, the leaves may crack while wrapping. If they are dry, simply rehydrate them in water before using.
Ingredient – Dried Shrimp
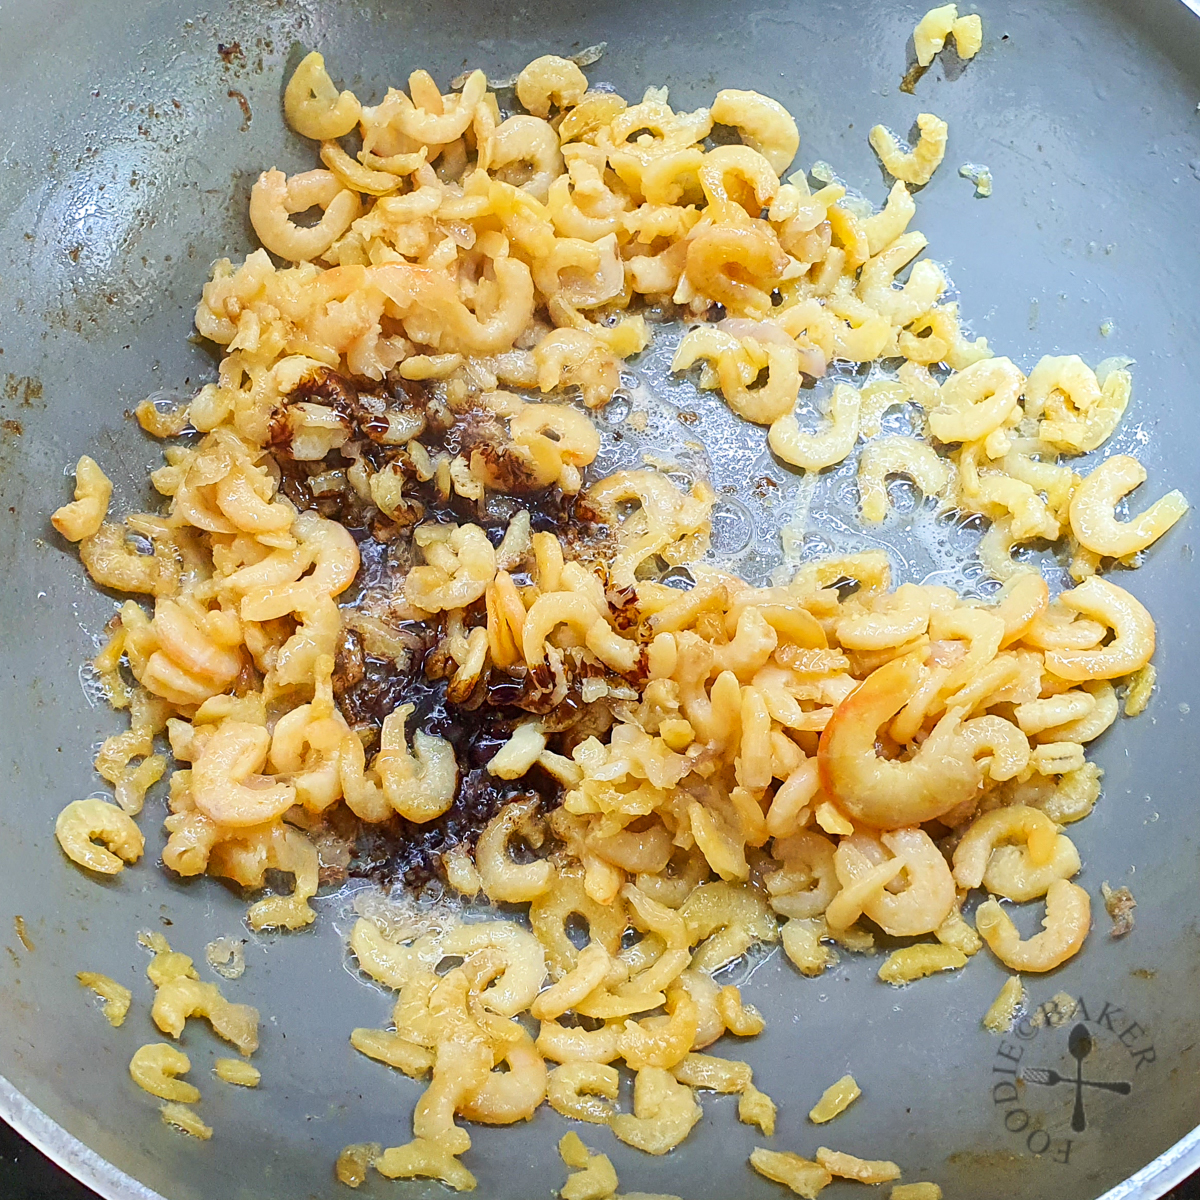 |  |
| 1) Soaked dried shrimps cooked in a little oil then coloured with dark soy sauce. | 2) Cooked dried shrimps with ready-to-eat chestnuts. |
The dried shrimps are rehydrated, then stir-fried in a little oil until they are fragrant. I like to add a little dark soy sauce to colour them.
Ingredient – Dried Shiitake Mushroom
 |  |
| 1) Rehydrated shiitake mushrooms, cut into small pieces. | 2) Shiitake mushrooms cooked in shallot oil. |
Dried shiitake mushrooms are rehydrated until soft. I snip off the stems and cut the caps into smaller pieces with a pair of kitchen scissors. If possible, I like to add 2 mushrooms per bak chang. I also like to get really small shiitake mushrooms. They can be added whole into the bak chang without cutting – it’s purely for aesthetic purposes. But this can only be done if I choose the shiitake by myself at the wet market, as supermarkets’ shiitake mushrooms are usually quite big in size.
Ingredient – Pork
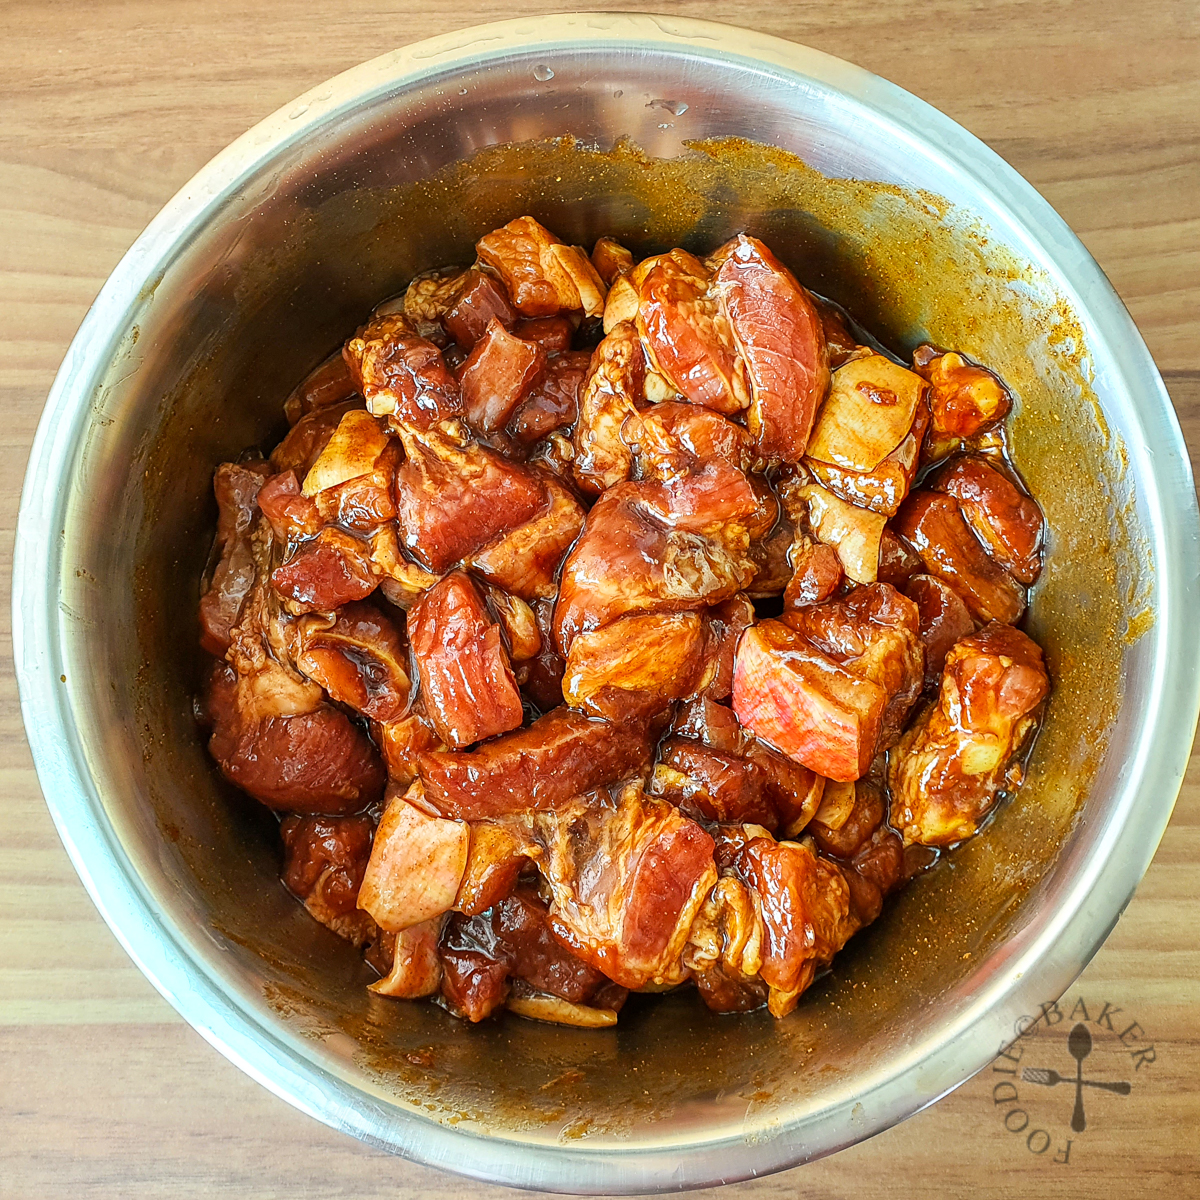 |  |
| 1) Pork belly cut into pieces and marinated overnight. | 2) Lightly braised pork belly with mushrooms. |
The pork is my ultimate favourite in the entire bak chang. The pork in my grandparents bak chang was so soft that it literally melted away in the mouth. However, I have hardly ever had a store-bought bak chang that tasted the same way. Not sure if it’s because they did not boil the bak chang long enough.
Pork: I use only pork belly when making bak chang. Please don’t ask me if there’s a lean meat option because I just don’t like the texture of lean meat inside bak chang. I used to use only fresh Indonesian pork but I made it with frozen pork belly from Sheng Siong in 2023 and it worked beautifully. The pork belly is cut into about 1.5-cm cubes (or finger-thick cubes). I like to put 2 to 3 pieces of pork per bak chang – I like meat (:
Pork belly part: Pork belly is a huge slab and are generally categorised into two parts, the upper and lower. The upper pork belly (上五花肉) is closer to the ribs, and contains a higher fat to meat ratio. You’ll see a huge slab of fat followed by a thin slab of meat. The meat also tends to be a bit more dry after cooking. The lower pork belly (下五花肉) is more balanced in terms of fat to meat ratio, which to me is more ideal for bak chang. I found only Chinese videos which talked about the different pork belly parts.
Not too fat, not too lean: The pork belly should not be too fat or too lean. (Yes there’s lean pork belly in which there is almost no fat between the skin and the meat.) A good pork belly should have a distinctive 5 layers – skin, fat, meat, fat and meat.
Not from the same slab: Given that I’m buying a huge amount of pork belly, I will try not to get all of them from the same slab of pork belly, as I will definitely end up with some upper pork belly.
Marinating: As with all grandparents’ recipes, there is no measurement, everything is agak-agak (estimated). I’ve scoured the web for many different recipes and after 4 attempts of tweaking, I’ve arrived at these quantities that I think I will stick to for a pretty long while. The five spice flavour is not too strong, so you can add more if you like. I like getting a new batch of five spice powder from the wet market (they sell really small packets) each time I wrap bak chang. Spices lose their flavour over time, so new packets = fresher spice = stronger flavour.
Braise: After marinating the pork overnight, the pork is stir-fried in shallot oil, then braised with the mushrooms and a little mushroom water. I don’t remember my grandparents braising the meat, but I think a light braise for more flavour will not hurt. I’ll probably braise the chestnuts together with the pork next time round as X commented this year that the chestnuts are not as flavourful.
Ingredient – Glutinous Rice
 |  |
| 1) Glutinous rice is rinsed until water is translucent, then soaked for 1 hour. | 2) The rice is then cooked in shallot oil. |
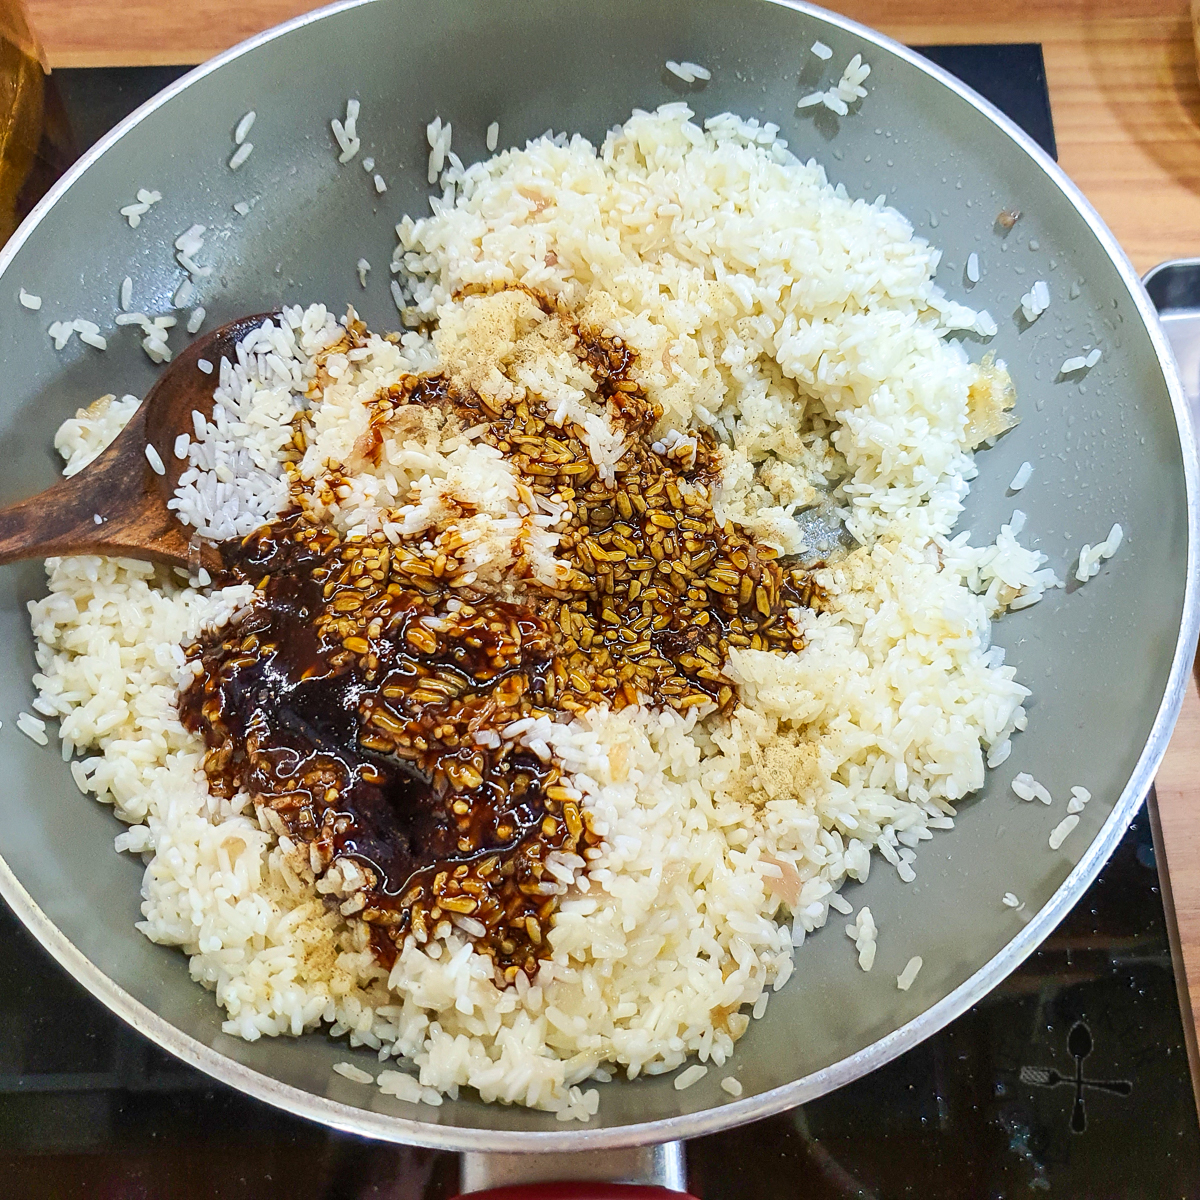 | 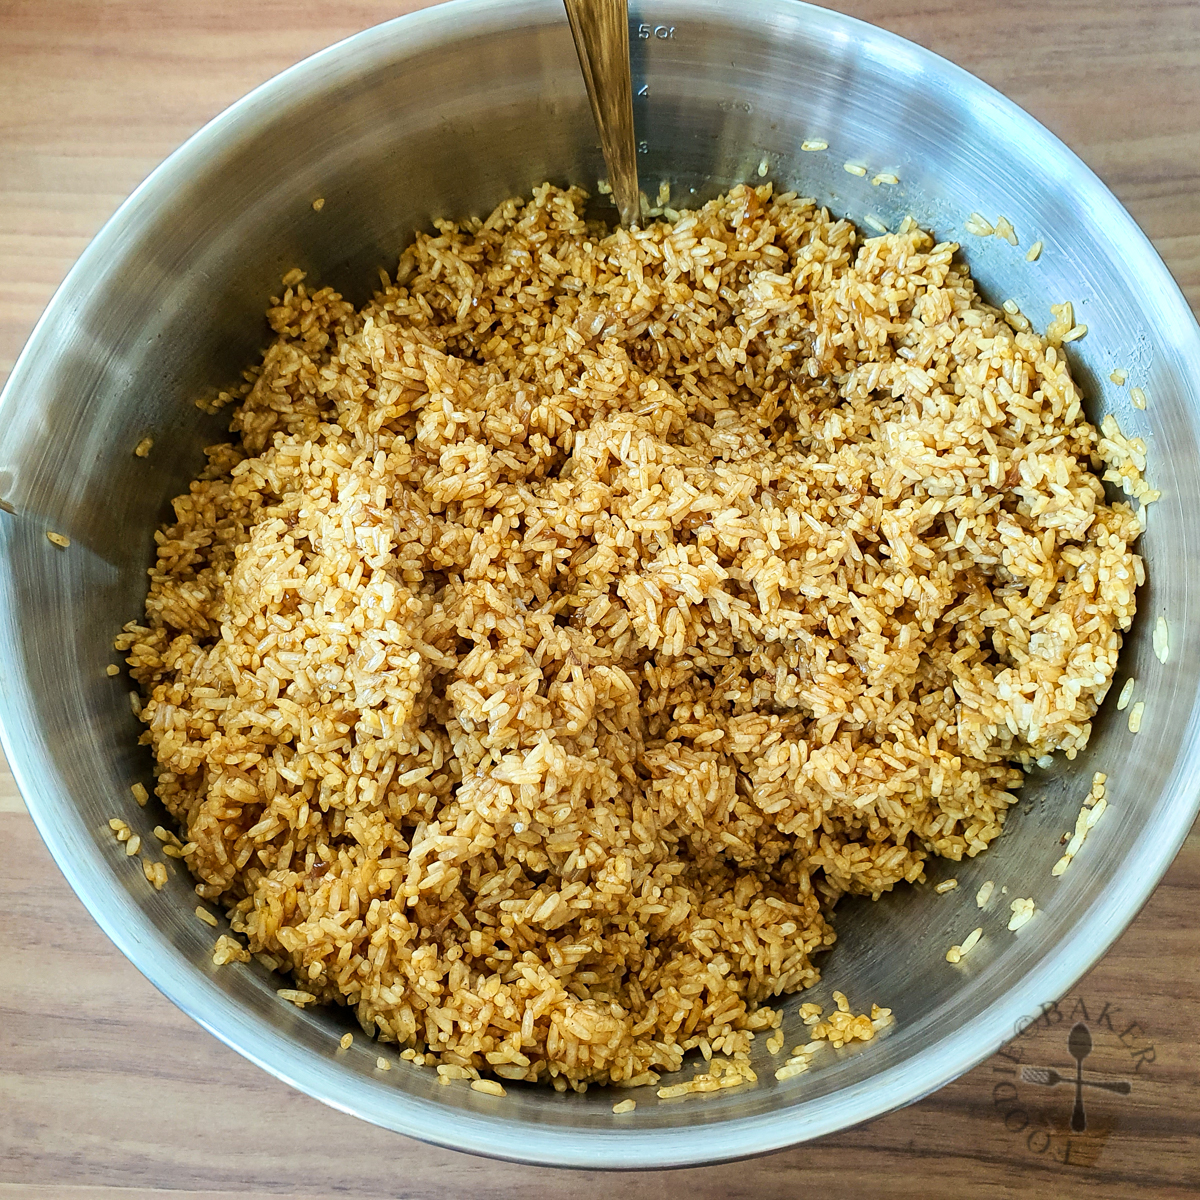 |
| 3) And coated with the seasoning. | 4) The rice is still loose and not sticky. |
Soaking: The beauty of using Instant Pot / pressure cooker is that there’s no need to soak the rice for a long period of time before cooking. I soaked the rice overnight for my first attempt and the rice turned out to be too mushy after cooking (no bite). Subsequently I soaked the rice for only an hour which is perfect for me. If you are planning to boil the bak chang, I think there will be a need to soak the rice overnight.(Though I have not tried boiling it, so you may want to research other recipes.)
Cooking: After soaking, the rice is cooked in plenty of shallots and plenty of oil. Seasoning is added to flavour and colour the rice. My grandparents always agak the quantities, so every year the flavour will fluctuate slightly – sometimes a bit bland, sometimes a bit too salty. The quantities I’ve provided yield a rice that’s slightly less salty than the ingredients, so it’s pretty balanced when they are eaten together. In terms of colour, it will look like the 2022 version. If you like it darker, you can add more dark soy sauce.
Consistency: The rice consistency will be pretty loose after cooking and not sticky.
Quantity: Store-bought bak changs have quite little filling (to keep costs down), but my recipe have quite a lot of filling. If you notice, I’m using almost as much pork (1.8kg) as the amount of rice (2kg). For each non-chestnut bak chang, it typically contains 2 mushrooms and 3 pork belly. For each chestnut bak chang, there’s 1 chestnut, 2 mushrooms and 2 pork belly. Of course, this can vary depending on the size of the bak chang (which in turn is dependant on the size of the bamboo leaves). But one thing to note is to be a bit more generous with the filling – unless you like rice…? Freeze leftover filling in portions – braise them to go with rice or dry-tossed noodles.
Wrapping, Cooking and Storage

Wrapping: I have to admit that it is definitely daunting when one tries to learn how to wrap bak chang. It’s probably the greatest deterrence – I will not want to cook all the ingredients but end up unable to wrap the bak chang. But, take that leap of faith! I watched countless YouTube videos to kickstart the learning process, but nothing beats hands-on practice. Once you’ve learned how to wrap bak chang, it will be like riding a bicycle – you will be a little unfamiliar at the start, but you will never forget it. I have taken a video of the wrapping in 2023 (embed below – slide to the 2nd image), but do Google / YouTube how-to videos as they are much more detailed.
Some tips: Here are some tips I’ve acquired and will remind myself every year I wrap bak chang (this is what works for me):
- The smooth, glossy and non-ribbed side of the bamboo leaves face inside.
- When layering the bamboo leaves, position the head at the ends so that it’s easier to fold down the bamboo leaves.
- Fold closer to the mid-line of the top leaf so that you can form a bigger cone. The head of the bottom leaf should exceed the head of the top leaf when folded so that you can form a seal.
- Start and end with rice. I like to fill in this order: rice, shrimp, mushroom, pork, rice, mushroom, pork and rice.
- When filling the cone, there is no need to pack down the rice too firmly as the rice will expand during cooking. If it’s too firm, it may burst the bak chang during cooking.
- Tie the bak chang across its thickest section, tugging the string slightly so that it’s tight.
Alternative: However, if you really find that you can’t wrap bak chang at all, you can simply layer the ingredients in a bowl then pressure cook / steam it until the rice is cooked.
First batch of bak chang: I can fit roughly 8 to 12 bak chang (depending on the size) in my 6 quart Instant Pot each time. The Instant Pot is then filled with boiling water – about 2 full kettles. 1 tablespoon of salt is also added – you may have to adjust the amount of salt if your pressure cooker is of a different size. Adding salt prevents the bak chang from becoming bland as the flavours are leached out during cooking. Pressure cook the bak chang for 45 minutes, rest for 5 minutes, then force release the pressure. Use a pair of chopsticks to carefully lift out the bak chang to cool.
Subsequent batches of bak chang: For subsequent batches, top up the water as necessary and add in 1 teaspoon of salt each time to maintain the salt content in the water.
Traditional boiling: I think my grandparents used to make bak chang with 5kg of glutinous rice (we really made a lot). My grandparents used a really huge pot (the restaurant soup stock kind) to boil the bak chang. The bak chang was boiled over charcoal fire (cheaper than gas) for probably 2 to 3 hours. Water was topped up frequently and the bak chang stirred often so that they cook evenly. Hence, the pressure cooker really made it a lot more convenient when it comes to boiling the bak chang.
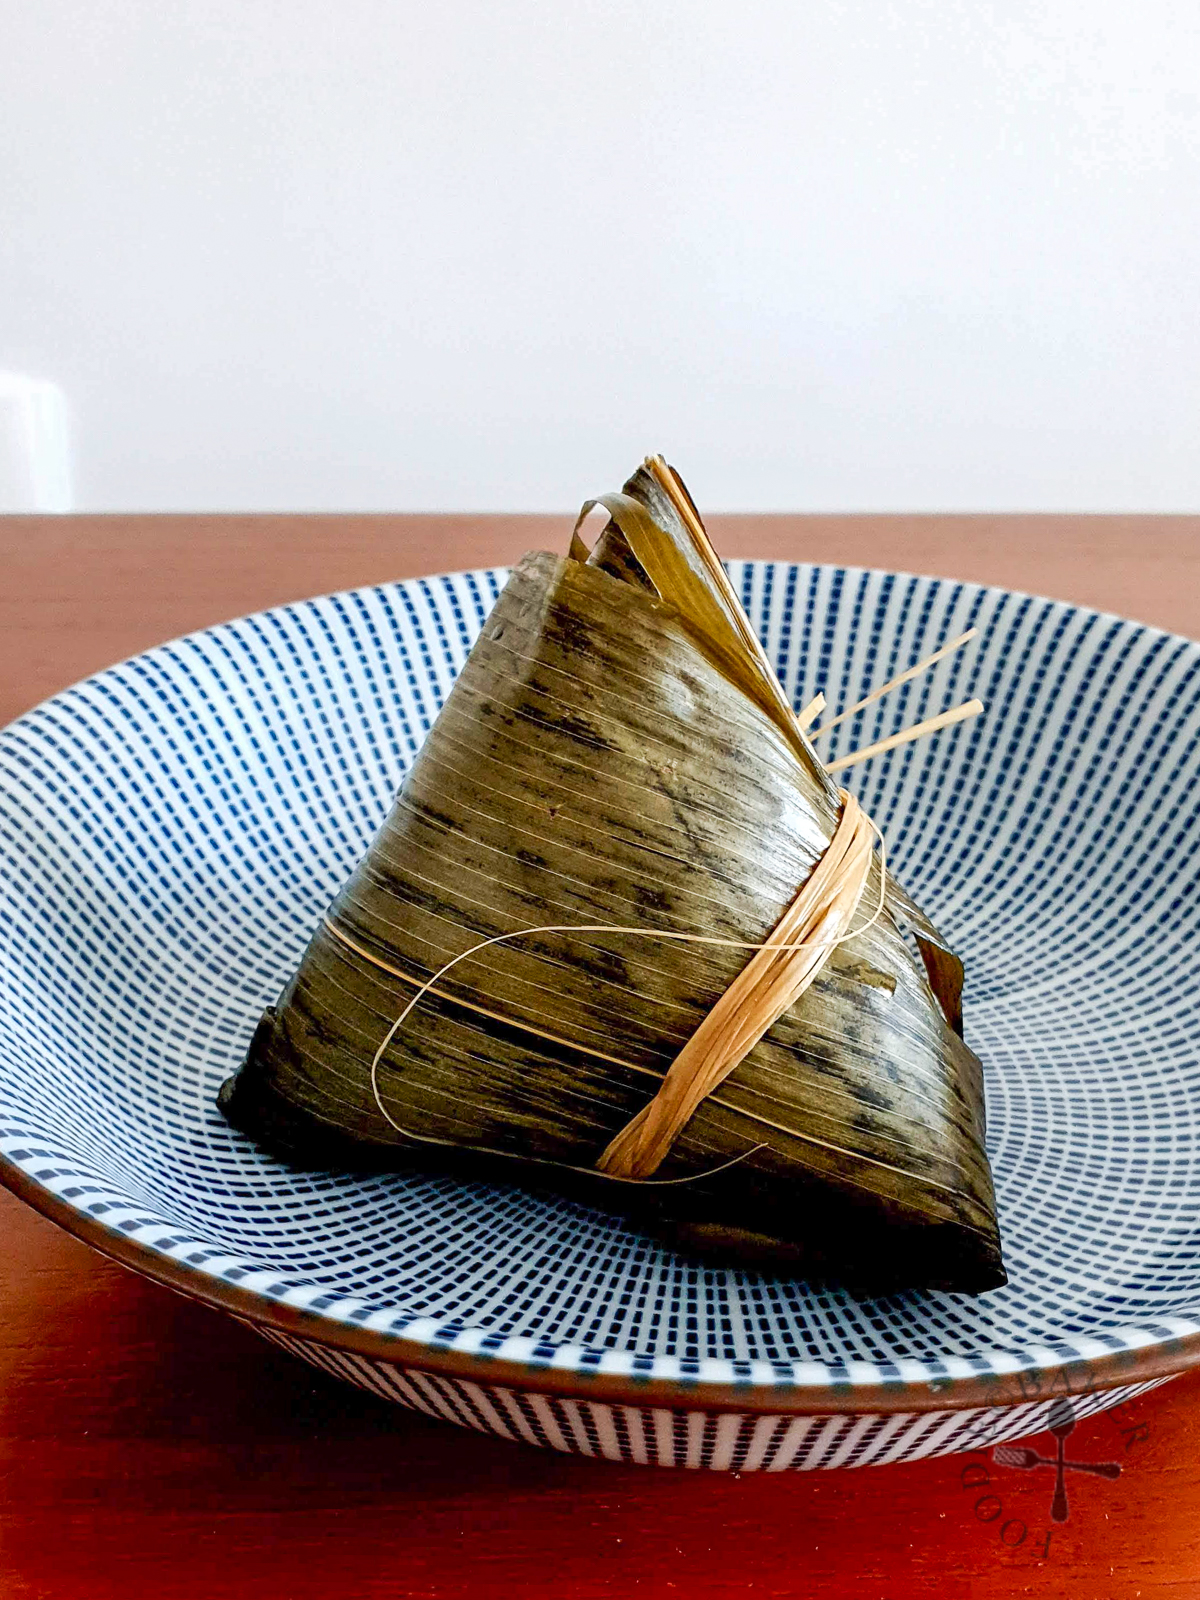
Storage: I store some of the bak chang in the refrigerator and some in the freezer. They can last for months in the freezer so I can have bak chang for many months to come. However, my grandparents had never store the bak chang in the fridge or freezer. They just hung them out in the open to air-dry and I think they had lasted more than a week! Upon researching, I read that the process of air-drying is key in preserving the bak chang: the starchy glutinous rice will become gluey and sticky after cooking, but dry up to form a “shell” when air-dried. This “shell” prevents the bacteria and mould from entering and “growing” in the dumplings. But I will not like to leave this to chance, so fridge / freezer is the way to go.
Reheat: Simply steam for 10 minutes (fridge) or 20 minutes (freezer) or until heated through. They taste better when warmed / hot.
My Grandparents’ Hokkien Bak Chang (福建咸肉粽 / Glutinous Rice Dumplings)
EQUIPMENT
- Pressure cooker
INGREDIENTS
Pork Belly
- 1.8 kg pork belly, skin on and not too lean (fat is flavour!), cut into 1.5-cm cubes
- 120 g oyster sauce
- 4 tbsp dark soy sauce
- 4 tbsp shaoxing wine
- 2 tbsp light soy sauce
- 2 tbsp sesame oil
- 2 tbsp five spice powder
- 2 tsp ground white pepper
- 100 g mushroom soaking water
Shallots
- 500 g shallots
- 300 ml oil, mild-flavoured like canola or peanut
Dried Shrimps, Mushrooms and Chestnut
- 200 g dried shiitake mushrooms, about 60 pieces
- 140 g dried shrimps
- 200 g chestnuts, ready-to-eat (I usually half this amount as only some like chestnuts inside their bak changs)
Rice
- 2 kg glutinous rice
- 2 tsp salt
- 120 g oyster sauce
- 2 tbsp sesame oil
- 5 tbsp dark soy sauce, can be increased for a darker colour rice
- 5 tbsp light soy sauce
- 4 tsp five spice powder
- 1 tsp ground white pepper
For Wrapping
- 400 g bamboo leaves, of AAAA quality, or large size
- 2 bunch bamboo twine
INSTRUCTIONS
The Day Before
- Pork: Combine pork belly ingredients and mix well to coat evenly with the marinade. Cover and marinate overnight in the refrigerator. Stir the pork belly one or twice if possible so that the meat marinates evenly.
- Mushroom: Soak mushrooms with enough water to cover until softened. Trim off the stems. Cut into half or quarters if they are large mushrooms. Continue to soak the mushrooms overnight in the refrigerator.
- Shrimp: Soak shrimps with enough water to cover. Chill in the refrigerator overnight.
- Shallots: Peel and thinly slice the shallots. Heat oil over medium-low heat in a small pot. Add in the peeled shallot and stir regularly. Once half of the shallots start to turn a light golden, remove the pot from the heat and allow residual hit to cook the shallots, stirring regularly. Don't worry if it's not fully golden, since you can cook it a bit more later on. But you'll have to start over if the shallots are burnt.
- Bamboo Leaves: Rinse the bamboo leaves and bamboo twine. Place in a large clean bowl (or in a cleaned sink) and submerge them completely under boiling water. After 1 hour, separate the leaves gently, then keep them completely submerged overnight. (Use a pestle and mortar (or a heavy glass bowl of water) to keep the leaves submerged if needed.)
The Day
- Rice: Rinse glutinous rice several times until the water is translucent – about 5 to 6 times. Soak in water for 1 hour, then drain well.
- Drain and squeeze dry the mushrooms and dried shrimps to remove excess water. Reserve 100g of mushroom water for the pork belly.
- Mushrooms: Heat wok over medium-high heat and add in 1/4 cup of shallot oil mixture. Cook until shallots are golden (if needed) and add in the mushrooms.
- Lower heat to medium-low. Cook, stirring frequently, until mushrooms are fragrant. Remove mushrooms into a bowl. (No need to clean the wok.)
- Shrimps: Heat wok over low heat and add in rehydrated shrimps. Add a little more shallot oil if needed. Cook over low heat until the shrimps are fragrant – you can tell they are ready when they start to spit and sputter ("piak").
- Add a little dark soy sauce to colour the shrimps. Remove the shrimps into a bowl and clean the wok.
- Pork: Heat wok over medium-high heat and add in about 1/4 cup of shallot oil mixture. Cook until shallots are golden (if needed) and add in pork belly, reserving the marinade.
- Stir-fry until meat is cooked on the outside. Add in the cooked mushrooms, reserved marinade and reserved mushroom soaking water. Cook over medium heat until water has been absorbed, stirring frequently. Remove pork and mushrooms into a bowl and clean the wok.
- Rice: Heat wok over medium-high heat and add in remaining shallot oil. Cook until shallots are golden (if needed) and add in salt.
- Lower heat to low and add in drained rice. Toss to coat rice with oil and add in all the rice seasoning. Toss to coat rice evenly with seasoning. Remove from heat and transfer rice into a large bowl. There is no need to cook the rice for long as you want the rice to be loose (not sticky) for wrapping. If your wok is too small, cook the rice in batches. I cook 500 grams of rice each time in my 24-cm wok.
- Bamboo Leaves: Use a pair of kitchen scissors to trim off the head and tail of the softened bamboo leaves. Discard leaves that are badly damaged (e.g. with large holes in the middle). Shake off excess water and set aside for wrapping. The leaves should be kept moist. If they dry out, the leaves may crack when wrapping.
- Rinse the bamboo twine and secure it on a rod or hook (I use the drying rack for my clothes).
- Wrap: Use two bamboo leaves to form a cone. Fill the cone with rice, shrimps, pork belly, mushrooms, chestnut and end with rice. Secure with bamboo twine.
- Pressure Cook: Fill 6-quart pressure cooker with bak changs and submerge them completely with boiling water. Add in 1 tablespoon salt. Pressure cook on high for 45 minutes. Rest for 5 minutes and force release the pressure. For subsequent batches, top up with water and add in 1 teaspoon salt.
- Storage: Let the bak changs cool completely on a wire rack before storing in the refrigerator or freezer.
- Reheat: Steam for 10 minutes (refrigerator) / 20 minutes (freezer) until heated through.
NOTES
- Do read the entire blog post for my own tips and notes.
What are you thinking?